hhobeika
-
Posts
23 -
Joined
-
Last visited
-
Days Won
1
Recent Profile Visitors
885 profile views


hhobeika's Achievements
Member (2/6)
44
Reputation
-
In my KGSSHV build, I used something similar to your grounding B scheme, and it's very quiet with no noise or hum whatsoever. I did not however use a series resistance and capacitance between the earth and the ground. They are directly connected. The XLR input connectors have a separate earth connection that I connected to the central earth connection.
-
Thank you.
-
I am having the same question as well as the PCBs I have for my next build are made as per the "kgsshvcarbon6ground2" file. From what I could see, comparing the 2 gerber files, the main change from kgsshvcarbonv6ground to kgsshvcarbonv6ground2 consists of moving the low level feedback signal trace for the servo from passing next to the output and high voltage supply Phoenix connector to passing much further away across the top of the PCB. Any feedback on this will be much appreciated.
-
Good catch. Haven't noticed that!
-
I don't think the temperature coefficient will matter in this part of the circuit but I guess both resistors would work just fine considering their voltage rating.
-
I used Vishay VR37000004704FR500 Metal Film 1/2W 4.7M 1% in my KGSSHV. Mouser P/N: 594-VR37000004704FR5
-
For rev 0.4 which is the one I built, it was either to cross the 50k resistors or the 1N914 diodes to correct the reversed feedback, not both. That also resulted in the output polarity O+ and O- being reversed. I am not sure if it was corrected in rev 0.5 but it should be easy enough to check by comparing the PCB traces between rev 0.4 and rev 0.5 if you have both.
-
Those are Nylon Caterpillar Grommet Strips repurposed as wire spacers. I cut them to the number of slots needed. Each is held in place using a tie wrap and a wire tie mount. You can find them at Mouser by searching under "grommet strip". I had some lying around so I can't give a specific part number but they come in various sizes. I only used them on the output wires to keep them spaced in order to minimize the capacitance. More photos of my build at the Dropbox link below: https://www.dropbox.com/sh/4ox0xh7s1aiw5cb/AACdu5DpeRyeFuINloC8HkRFa?dl=0 Hope this helps.
-
Excellently done and very methodical. It was a pleasure to follow your building steps. Congratulations!
-
Very nicely and cleanly done! Looking forward to seeing more progress.
-
Since photography is a hobby of mine as well, I decided to take some internal and external pictures of my recently completed KGSSHV. Hope you enjoy them. Please click or copy/paste the Dropbox link below to view those pictures: https://www.dropbox.com/sh/4ox0xh7s1aiw5cb/AACdu5DpeRyeFuINloC8HkRFa?dl=0
-
I second this ebay seller as I initially purchased from him. He has large variety of colors. The hook-up wire I used is multi-stranded PTFE #22 for all but the earth where I used #18. Another source that sells per foot that I also used is Remington Industries either directly through their website or through amazon (www.remingtonindustries.com). There is also Bulk Wire (bulkwire.com) but I haven't purchased from them.
-
Thank you. I had the advantage of being late in the game and building on the collective experience in this thread.
-
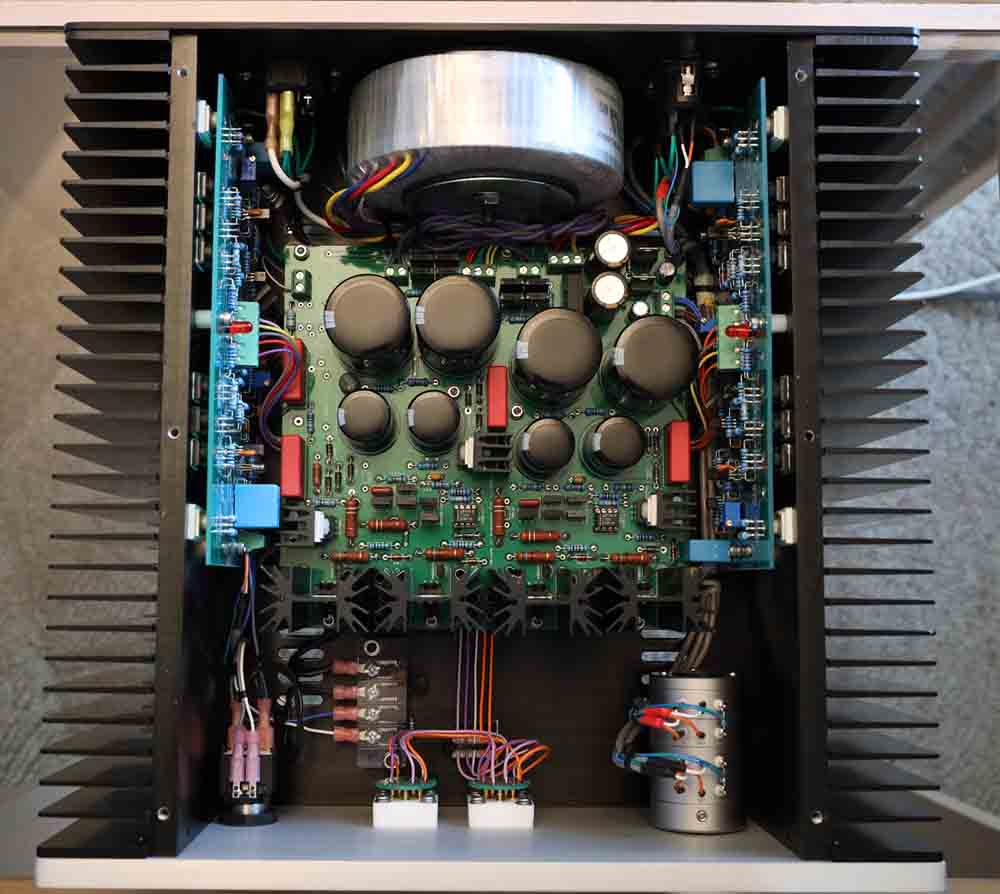
Here is a picture of the inside. There is a limit on the file size I can upload so I had to dramatically shrink it and compress it to be able to post it.

-
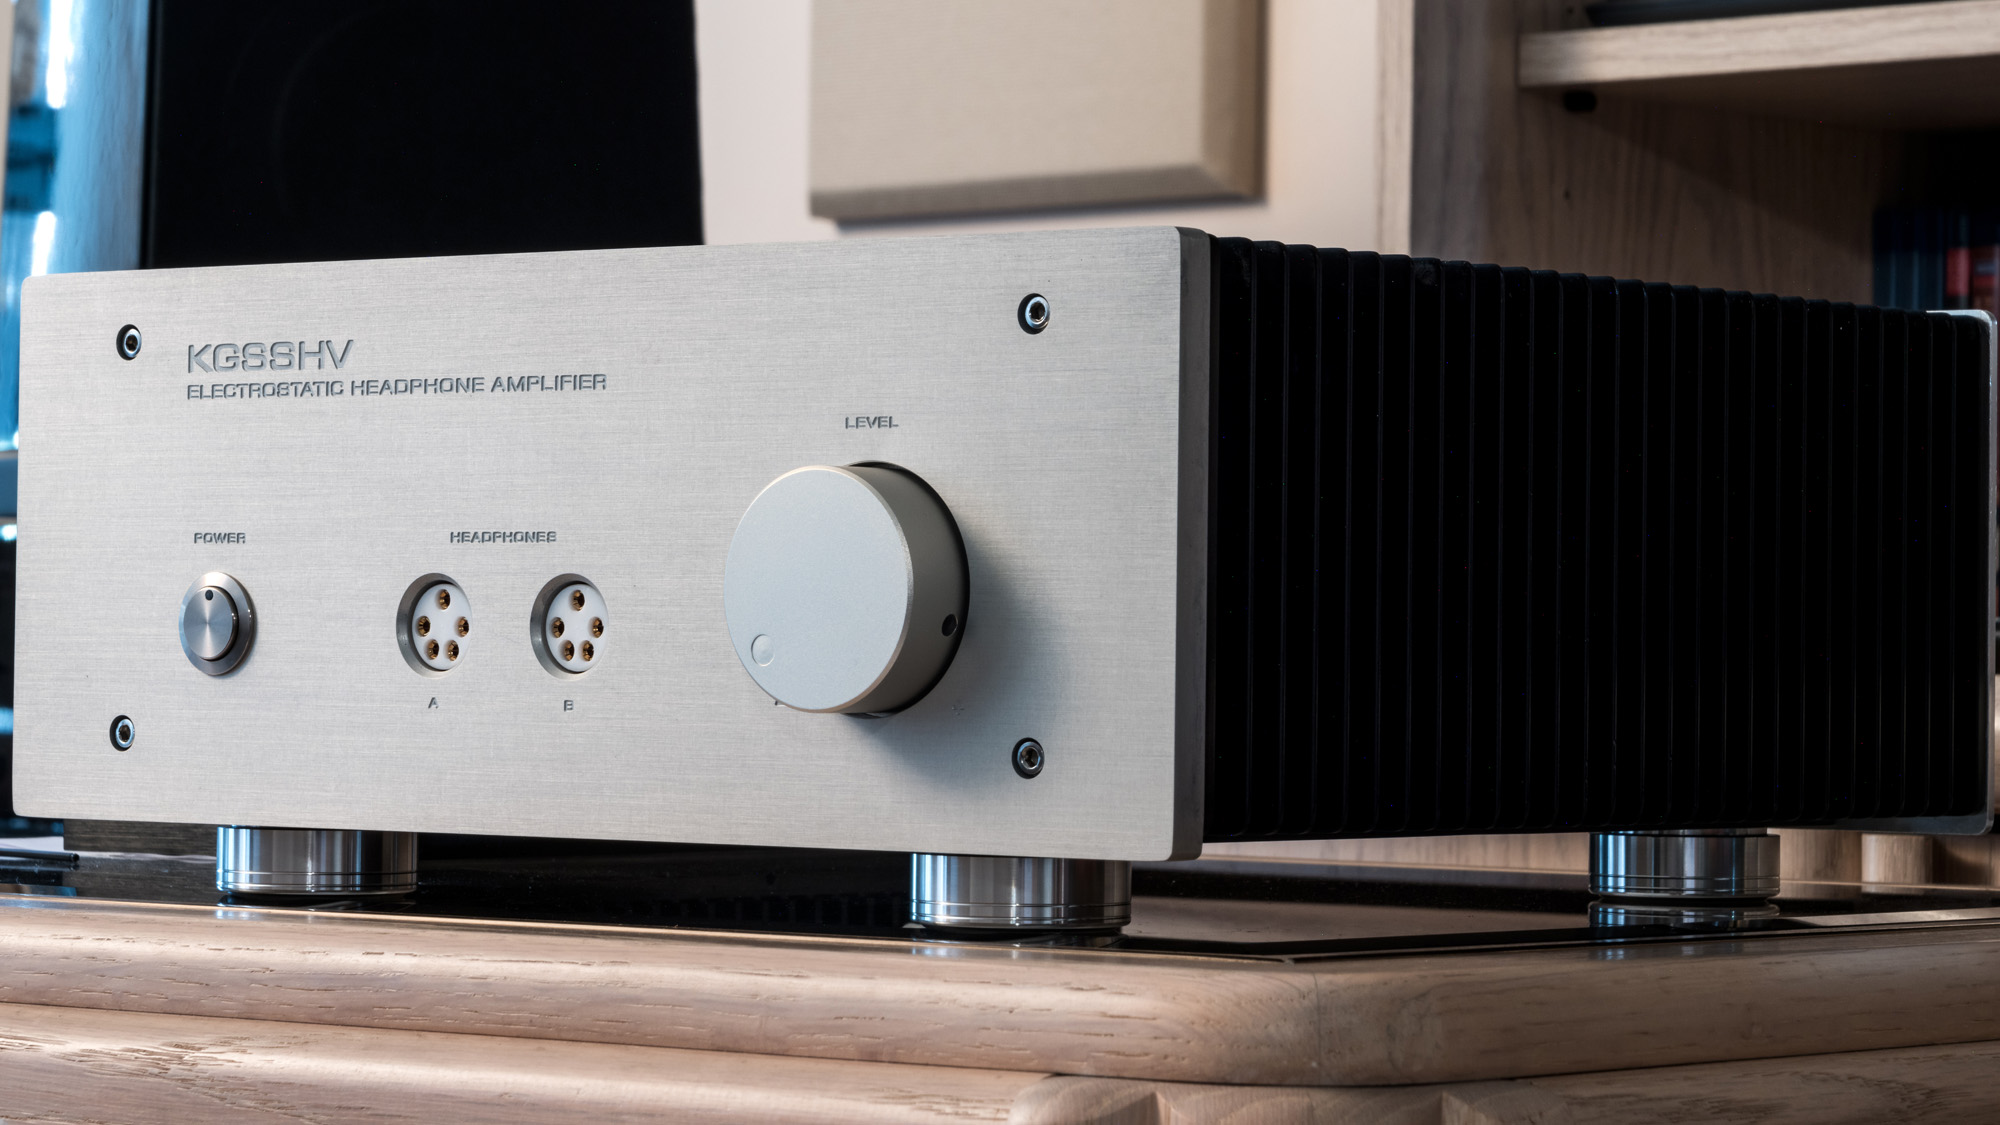
After 5 years from the time I acquired the PCBs and parts, I finally took advantage of the free time created by the pandemic and completed my KGSSHV. This is the offboard version with +/-500V supply. I know many have since moved on to the Carbon but I am very happy with the results and plan on building myself a Carbon in the near future. Hopefully it won't take me that long this time. Thanks to Kevin for the great design, Spritzer for his support and providing some of the parts and this thread from which I learned a lot. The case is from Aliexpress but I got a new front panel made at the local machine shop.