

Leaderboard


Popular Content
Showing content with the highest reputation on 10/09/21 in all areas
-
10 pointsMilo & Otis took a big step towards enclosing the new shop today. We framed two of the three walls with rough openings for double doors and a 4x4 window. All studs are old growth straight grain Douglas Fir that I salvaged from the house my brother is about to tear down. Straight and sound and fun to work with. Tomorrow we will build the third wall on the floor and then plop it into place with the sheathing and clapboards already on it because there is no room to work between the rock wall and the framing over on that side.


 10 points
 -
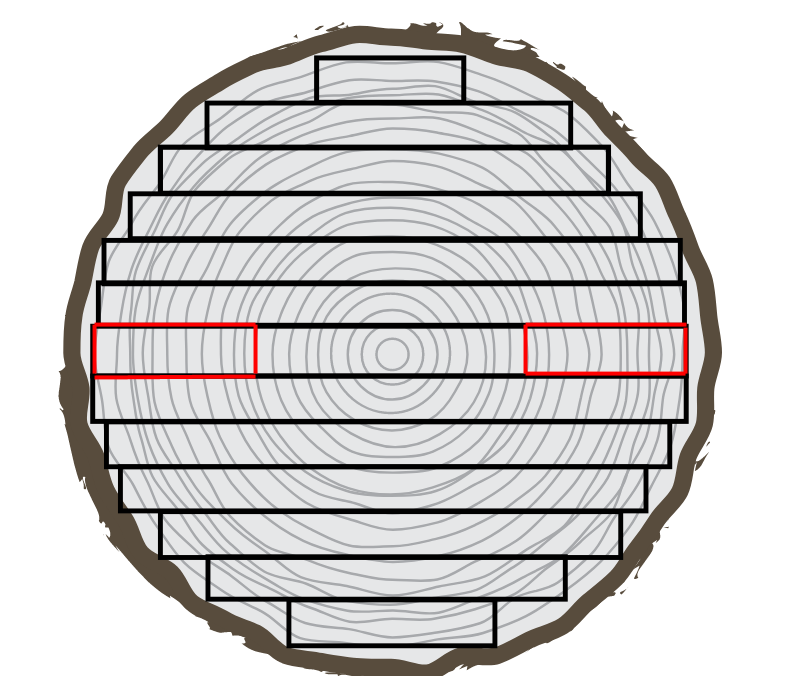
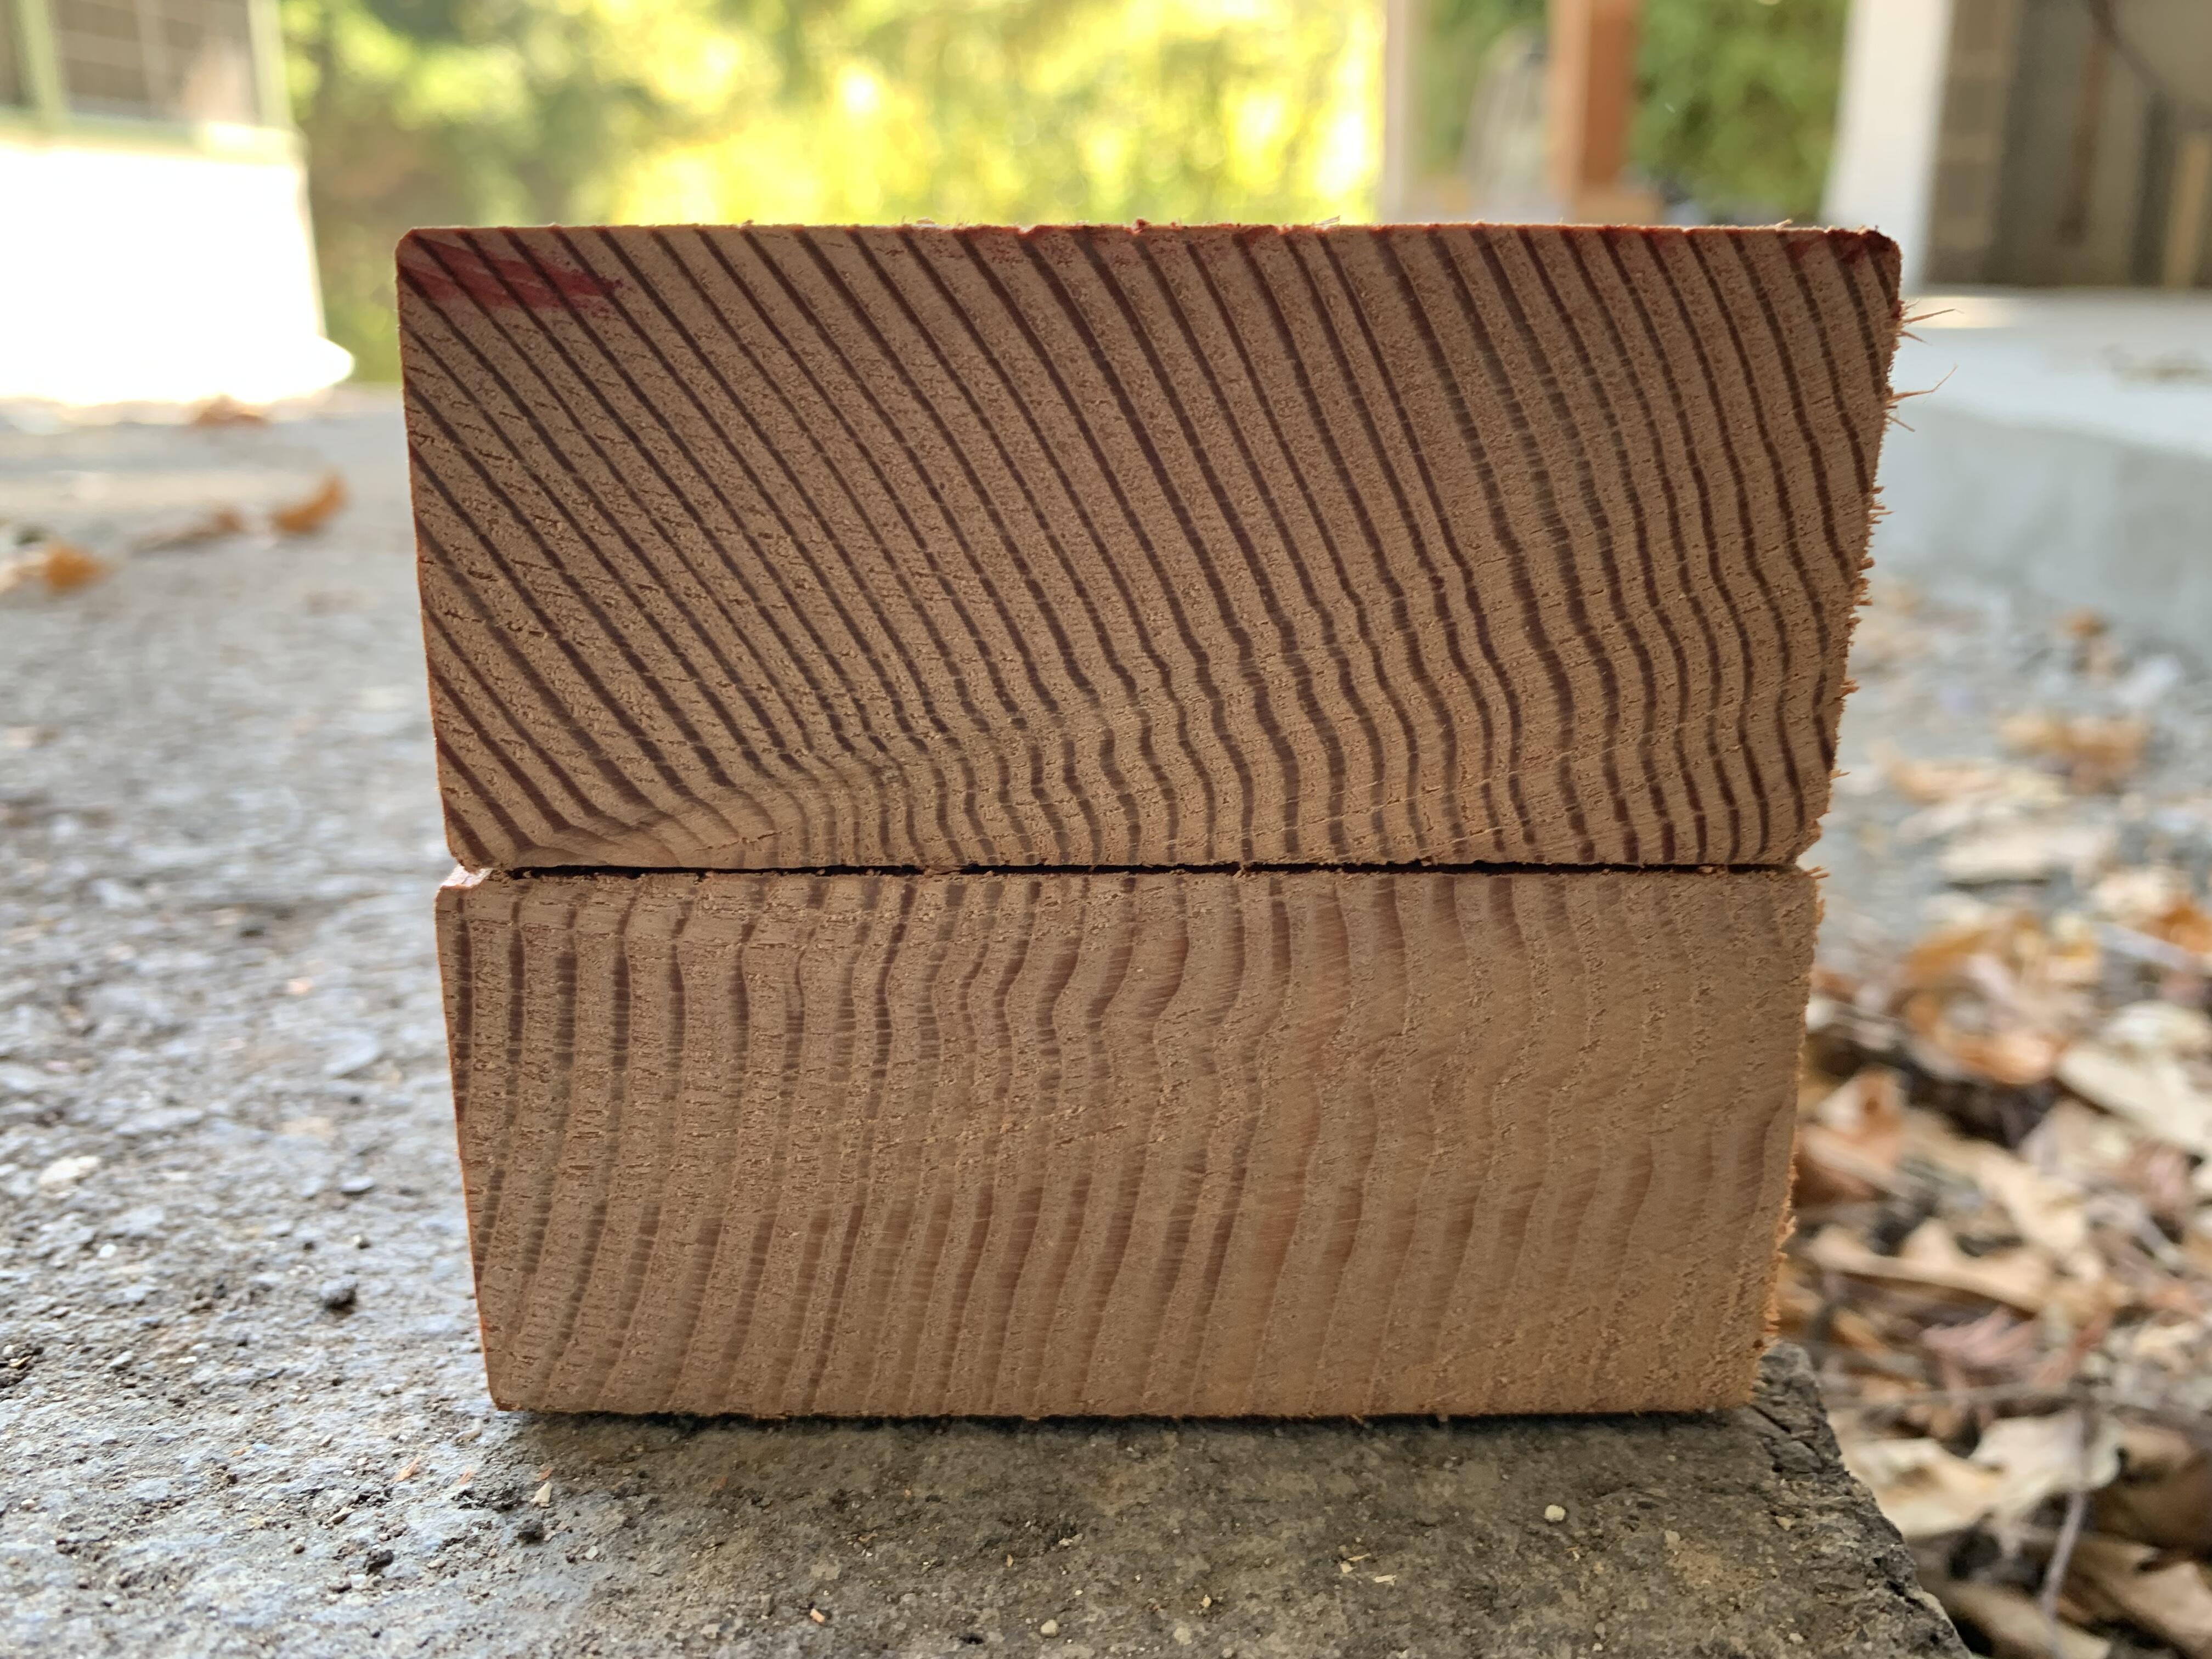
6 points6 points3 pointsA nice trick - soft wood is plain sawn from trees just big enough to yield a 2x12. The 2x12's are taken across the middle with the 2x4's from the edge. Those edge pieces are the most likely to warp, but if you take a 2x12 and turn it into 3 2x4's, the two from the outside edges are effectively quarter sawn and are much more likely to be stable.
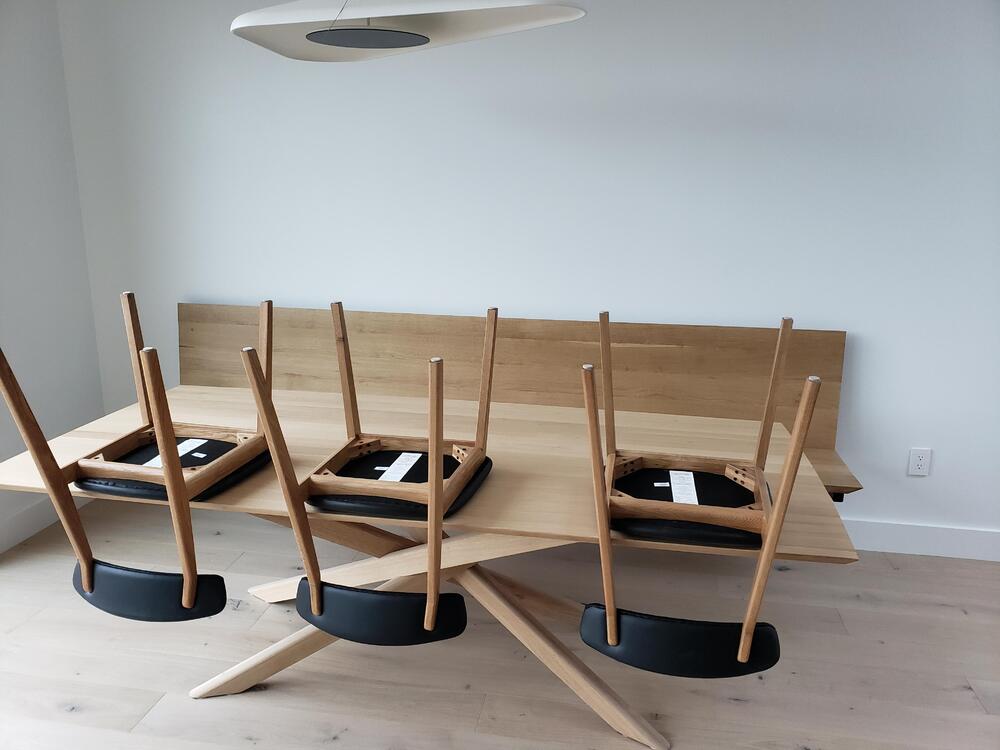
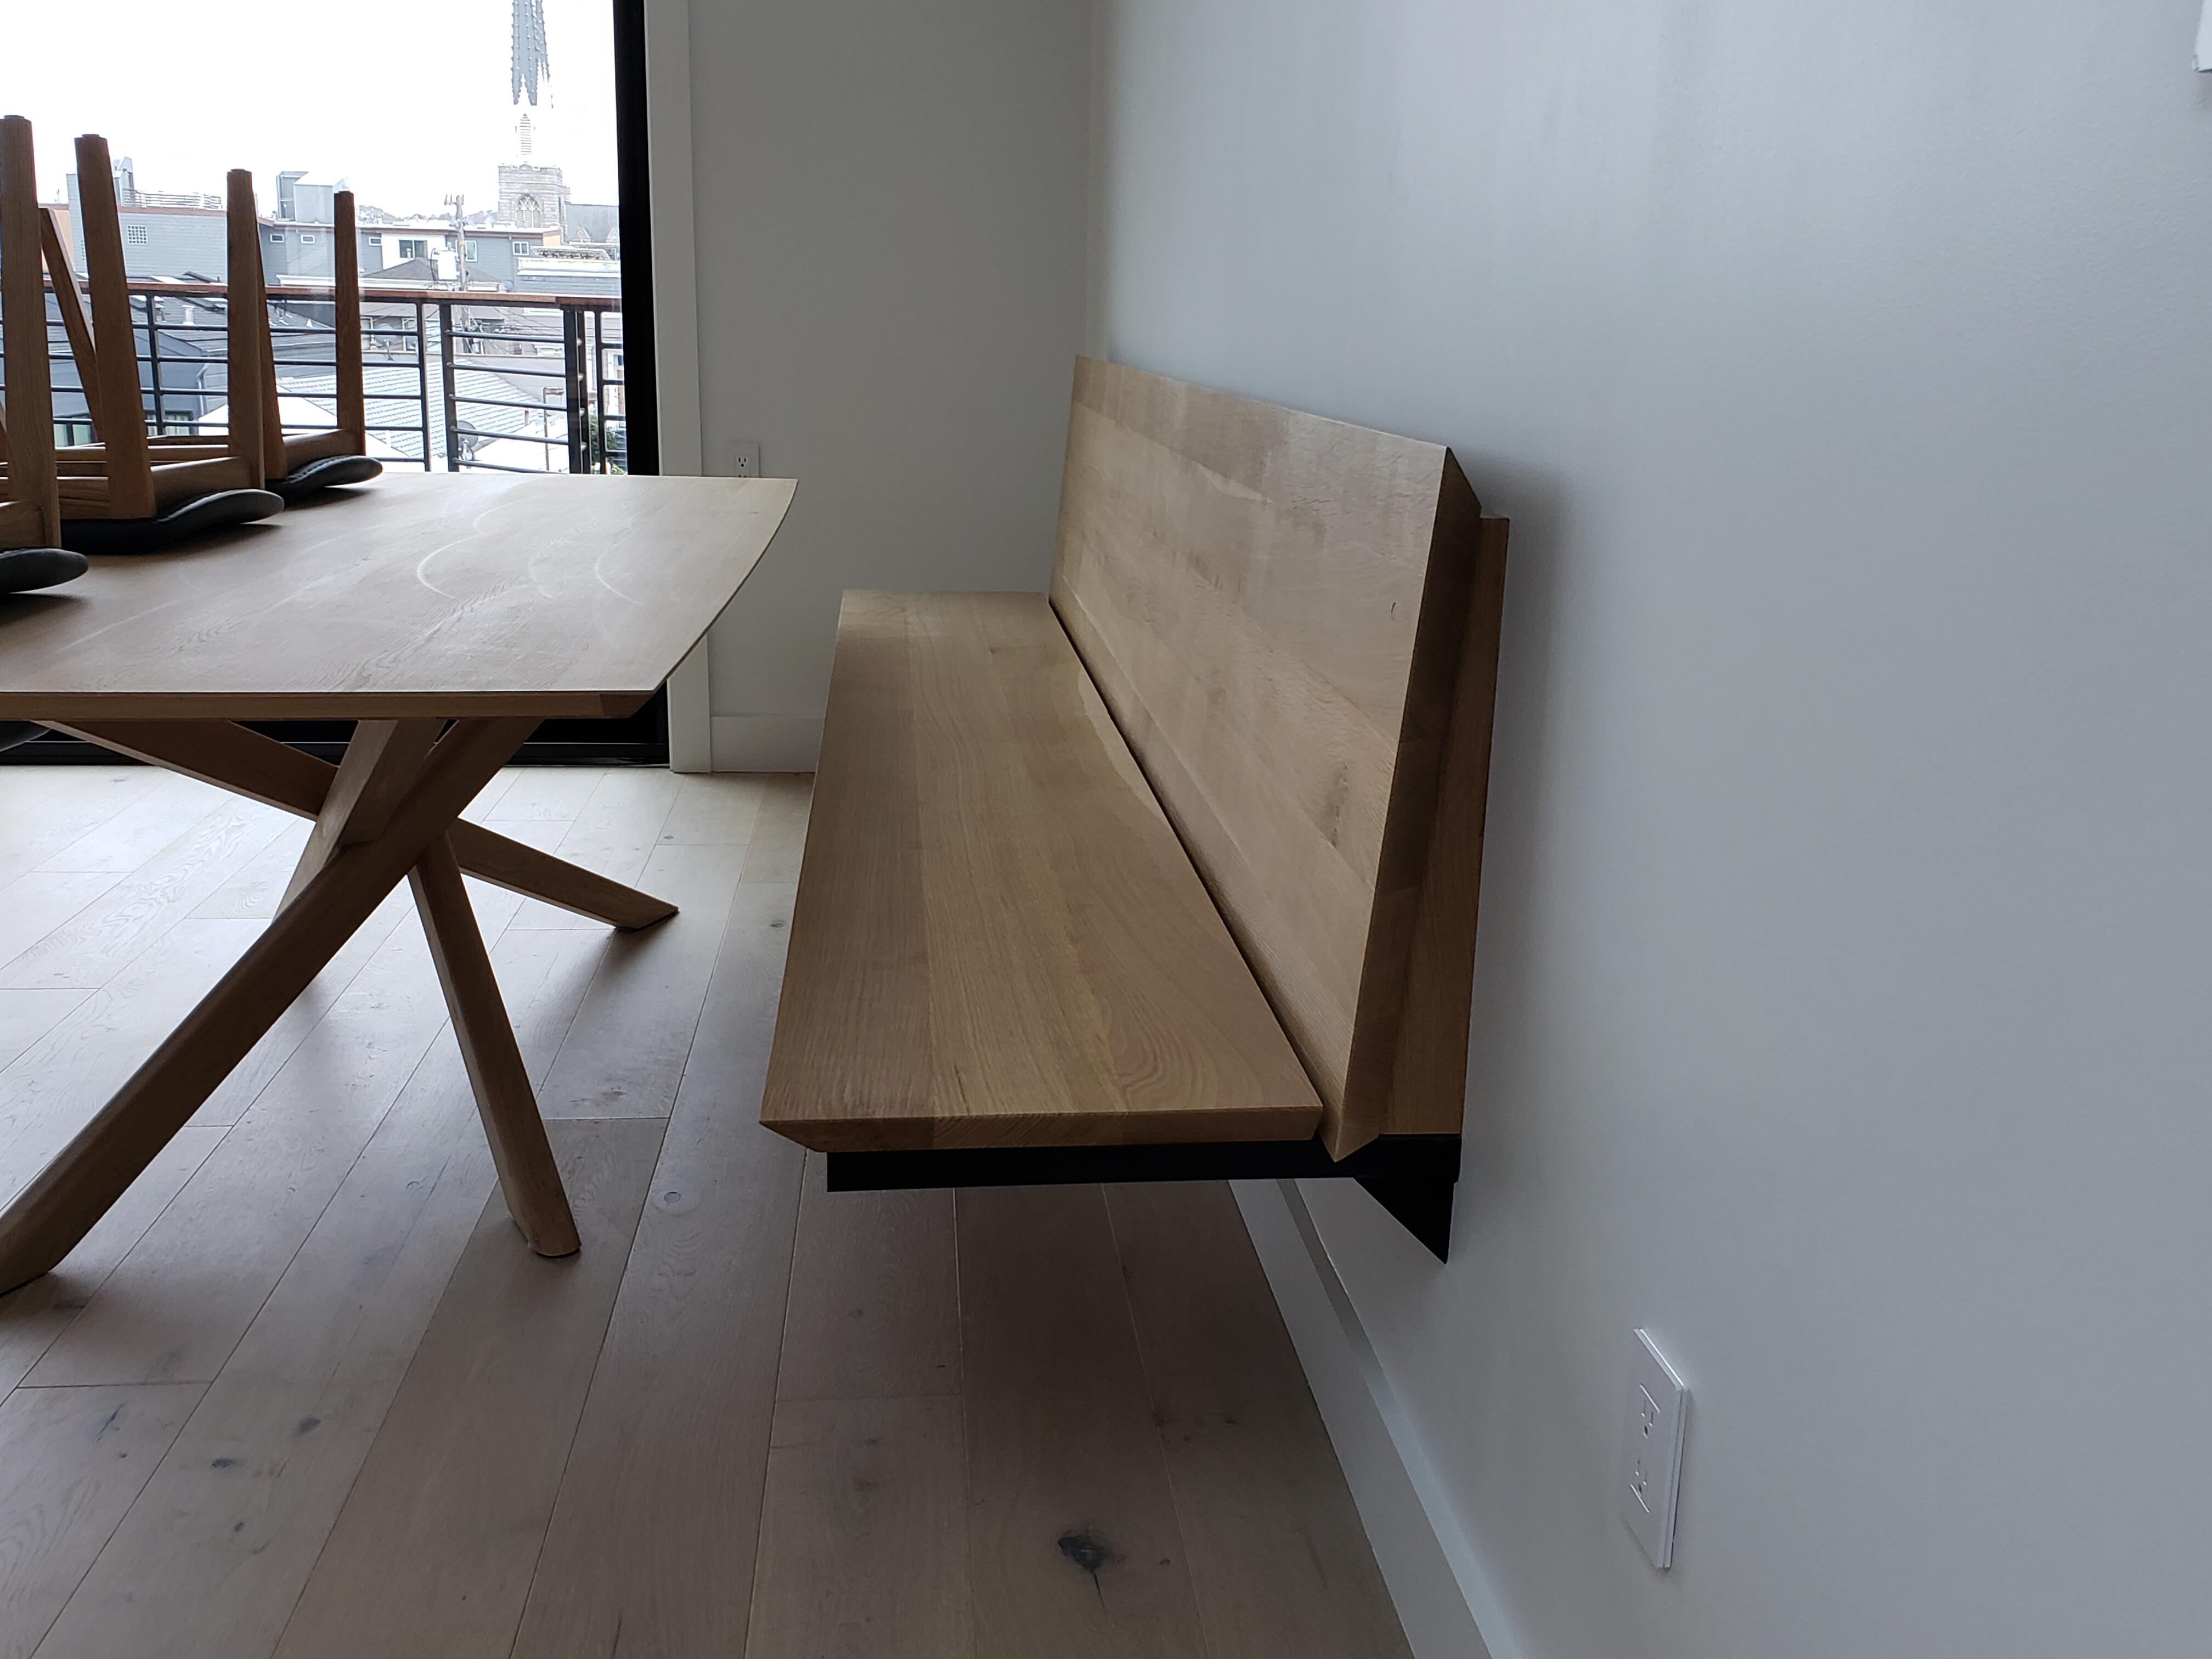
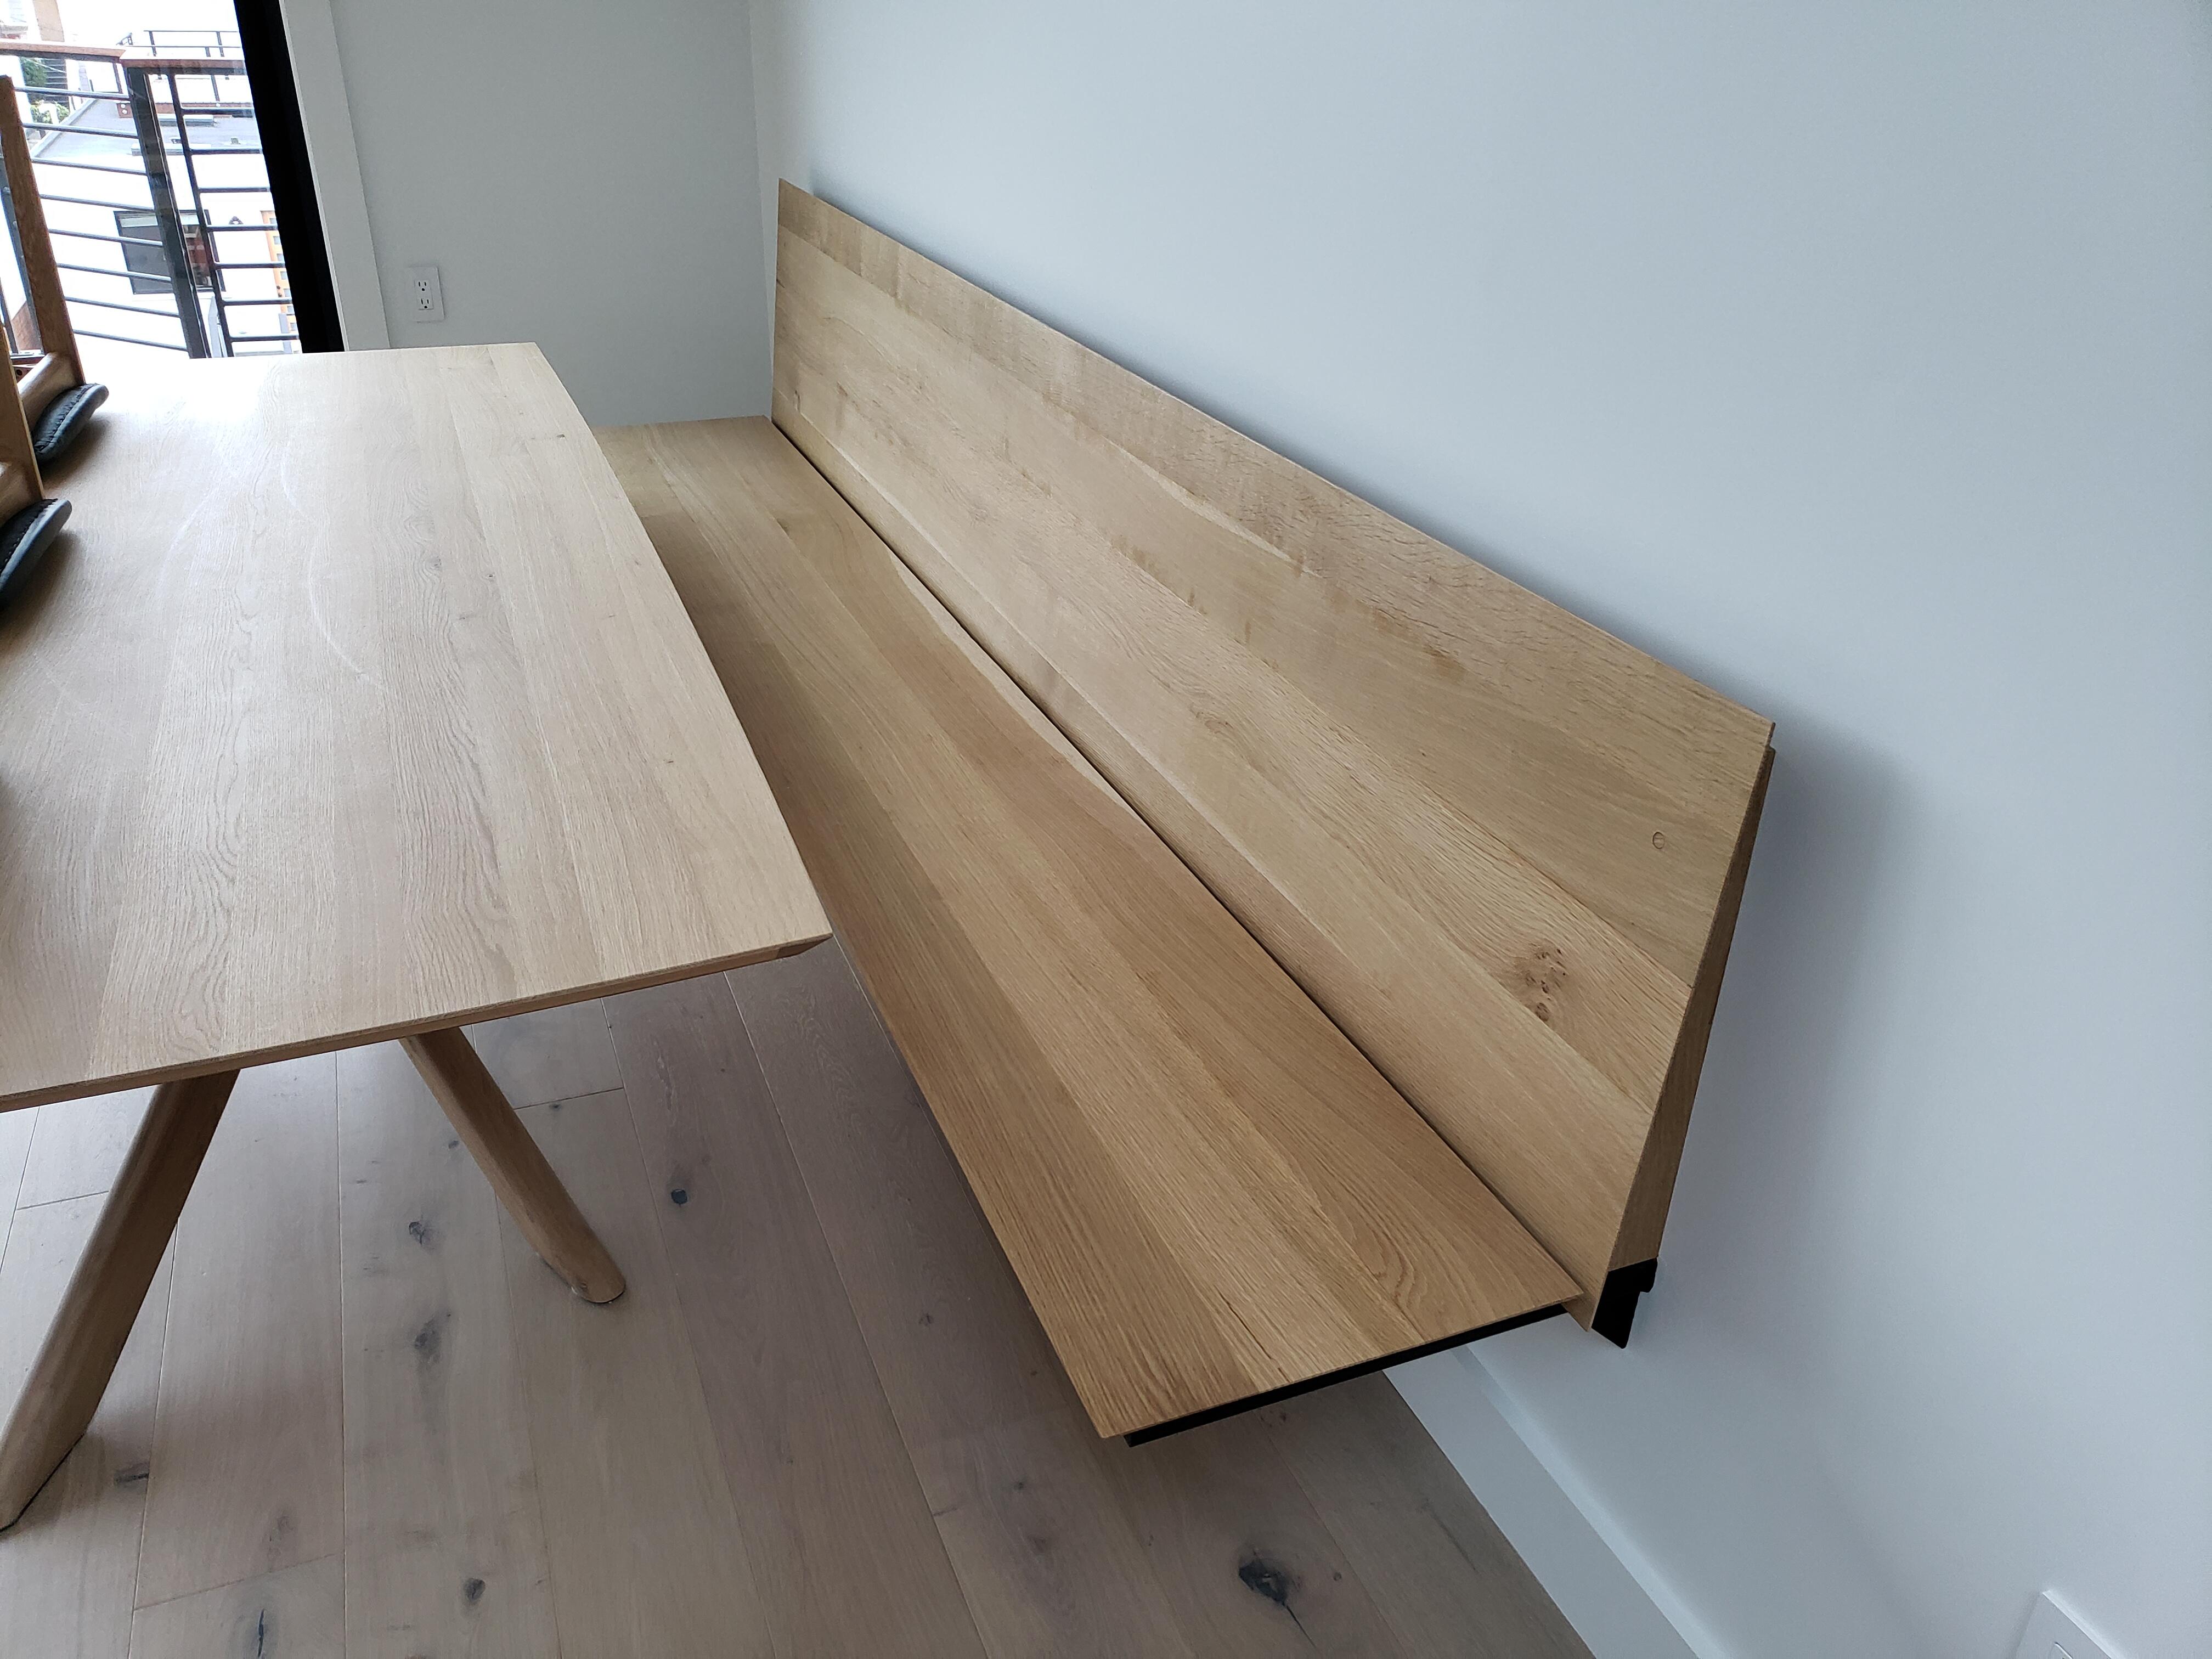
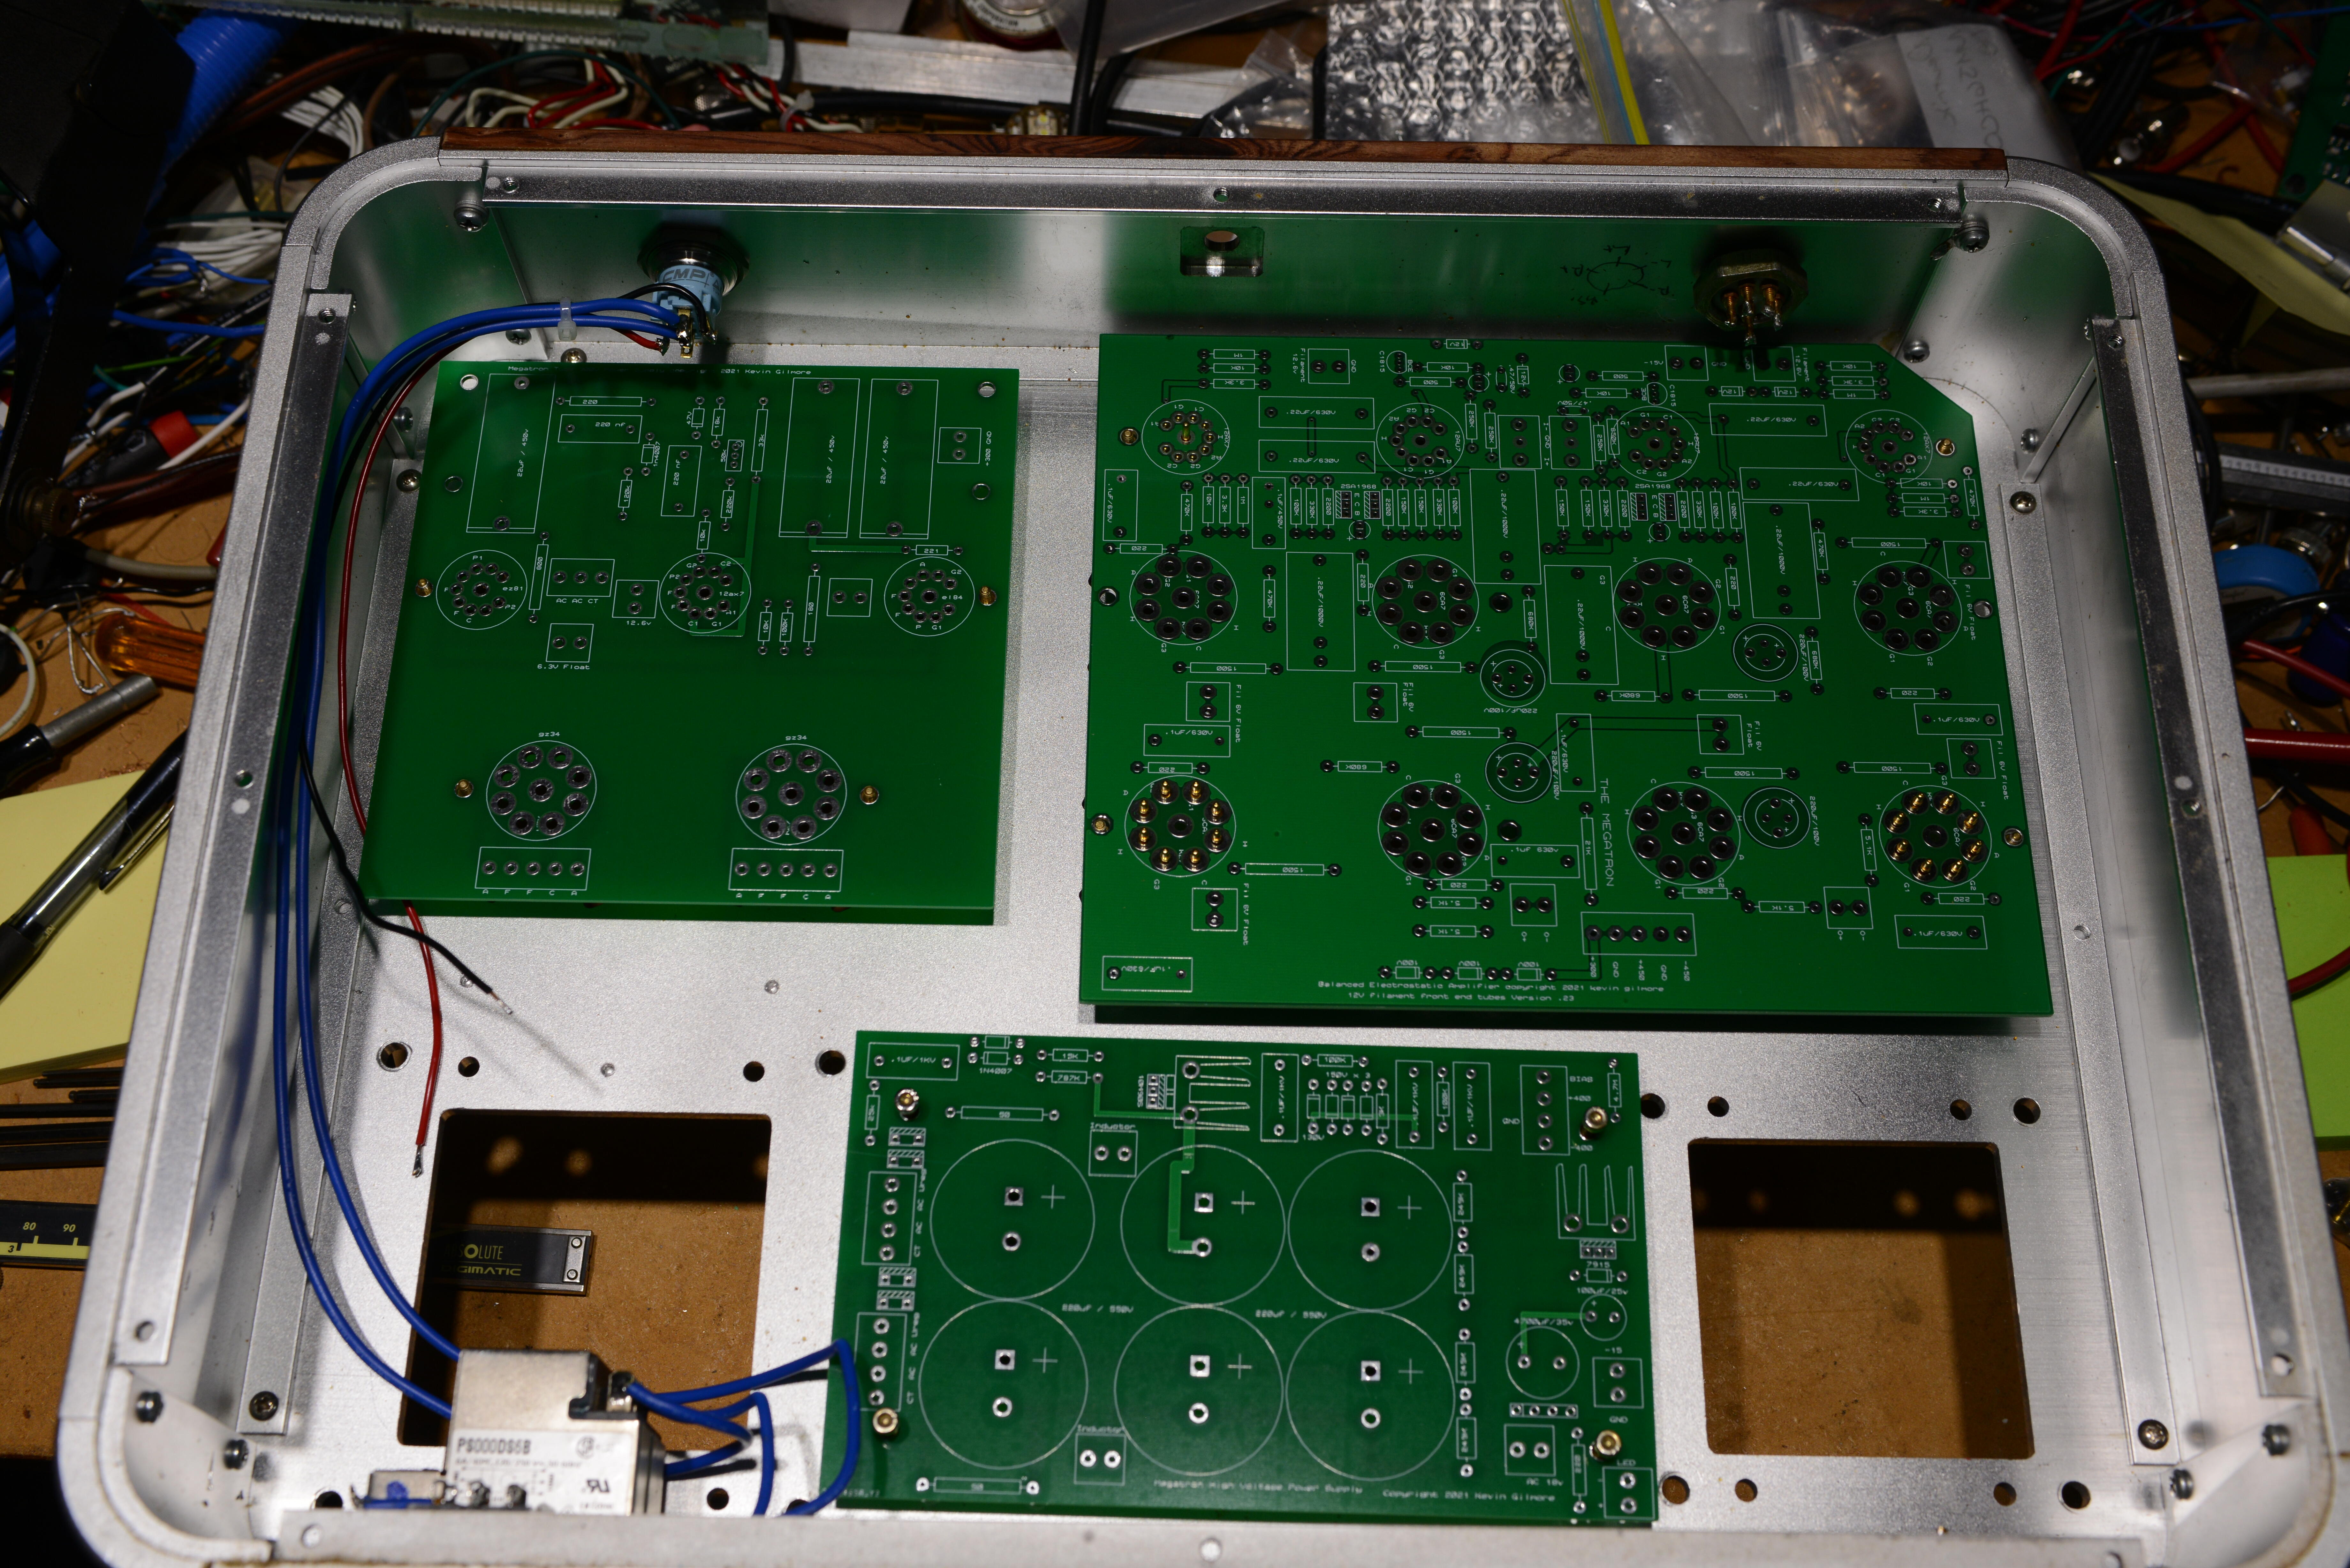
 3 points2 pointsIt's such a treat to work with straight and true lumber again, and normally I don't like anything straight. 😋 I also like that it's going to look like it's always been that way. And if the shop ever goes away, we can just cut a door into the back wall, because there's a bedroom and full bath behind the garage. Put in a kitchenette, and you have another goldmine Fairfax rental. Or put an aging Carpenter up in his old age. 🤪2 points2 points2 points1 point1 pointVoice = Spongebob Narrator "Two Months Later" I got an idea how to resurrect my radio show even without a laptop. Stay tuned.1 pointthis is a put together chassis of a specific size. where he bought the chassis i do not know, but it completely comes apart, all 4 sides, the round corner pieces etc. Then he had the front,back and top all machined. all panels are .2 inch thick. And the front wood piece is esentially a stick on made of unknown wood. absolutely every single thing about this is fucked to the max. broke the anti-spin pin off the pot and did not even bother to drill a single hole to prevent the pot from spinning. Some of the work was definitely done by an nc mill, and a really shitty one at that. on the mill i used, everything was accurate to .00001 inch, and it really was at least this accurate. this thing is barely accurate to .008 inch. nothing on either inch or metric boundaries. and the holes for the power supply board were drilled by hand, and blind tapped, 2 of the 4 holes went all the way thru the panel. But the worst is the way under-rated power transformers which were potted with definitely the wrong stuff. And wiring all the filaments together. And the stax jack it turns out is also massively fucked. And force held in with rubber o-rings. Gold plated hex screws with the gold coming off. And the tube sockets were really low quality garbage, as bad as the russian crap that mikhail used. The 3 boards from jlcpcb were a total of $65 with shipping. and shipping was half the price. The hand dremel tooled boards were so utterly fucked, no reason for any of this. Somebody really high on really bad drugs did this. Not even mikhail or mike bean (hennyo) could do something so utterly and completely fucked. Wow, i gave hennyo a compliment, yikes. The 300v tube supply is actually pretty clever and kind of unique, but also utterly fucked because he had the pass tube cathode wired to ground when it had to be connected to 300v. And the bias supply with a 100k series resistor. Guaranteed to kill your headphones. Its not my money going into this, so i will continue till its either completely finished and working or the tube diode power supply cannot be made to work. Looks like the repair price will be about $1500 in parts, plus the original purchase price of about $5k. All the improvements to the amp board are in the new board. There are places for solid state diodes on the power supply just in case. There is no reason for any of this. So far i have about 30 hours of labor in this. The mikhail es1 ended up about 50 hours of labor. Yes i'm fucking nuts. all you have to do is take my board files, have them made, stuff with parts, slap into chassis. how fucking hard can it be.1 point1 pointThe above is one of the better ones I had seen, it goes into details about removing the adhesive1 point1 pointThis was a few weeks ago, but just got pictures after installation today. It's a floating bench that a customer asked me to build to match their dining table. It's 8/4" Rift Oak.
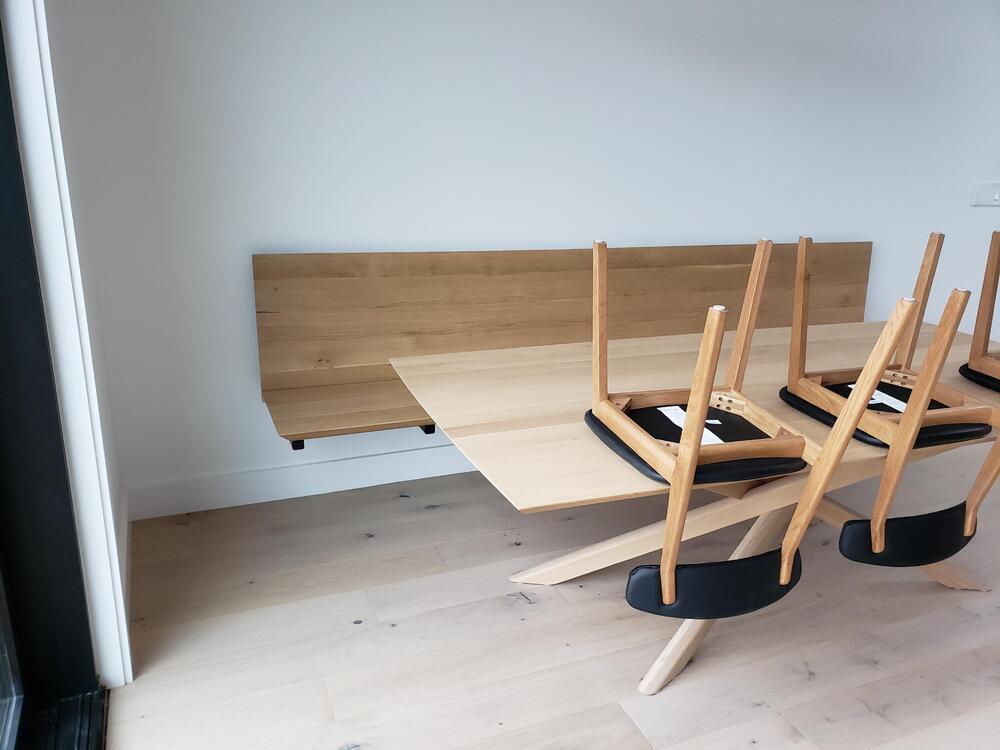

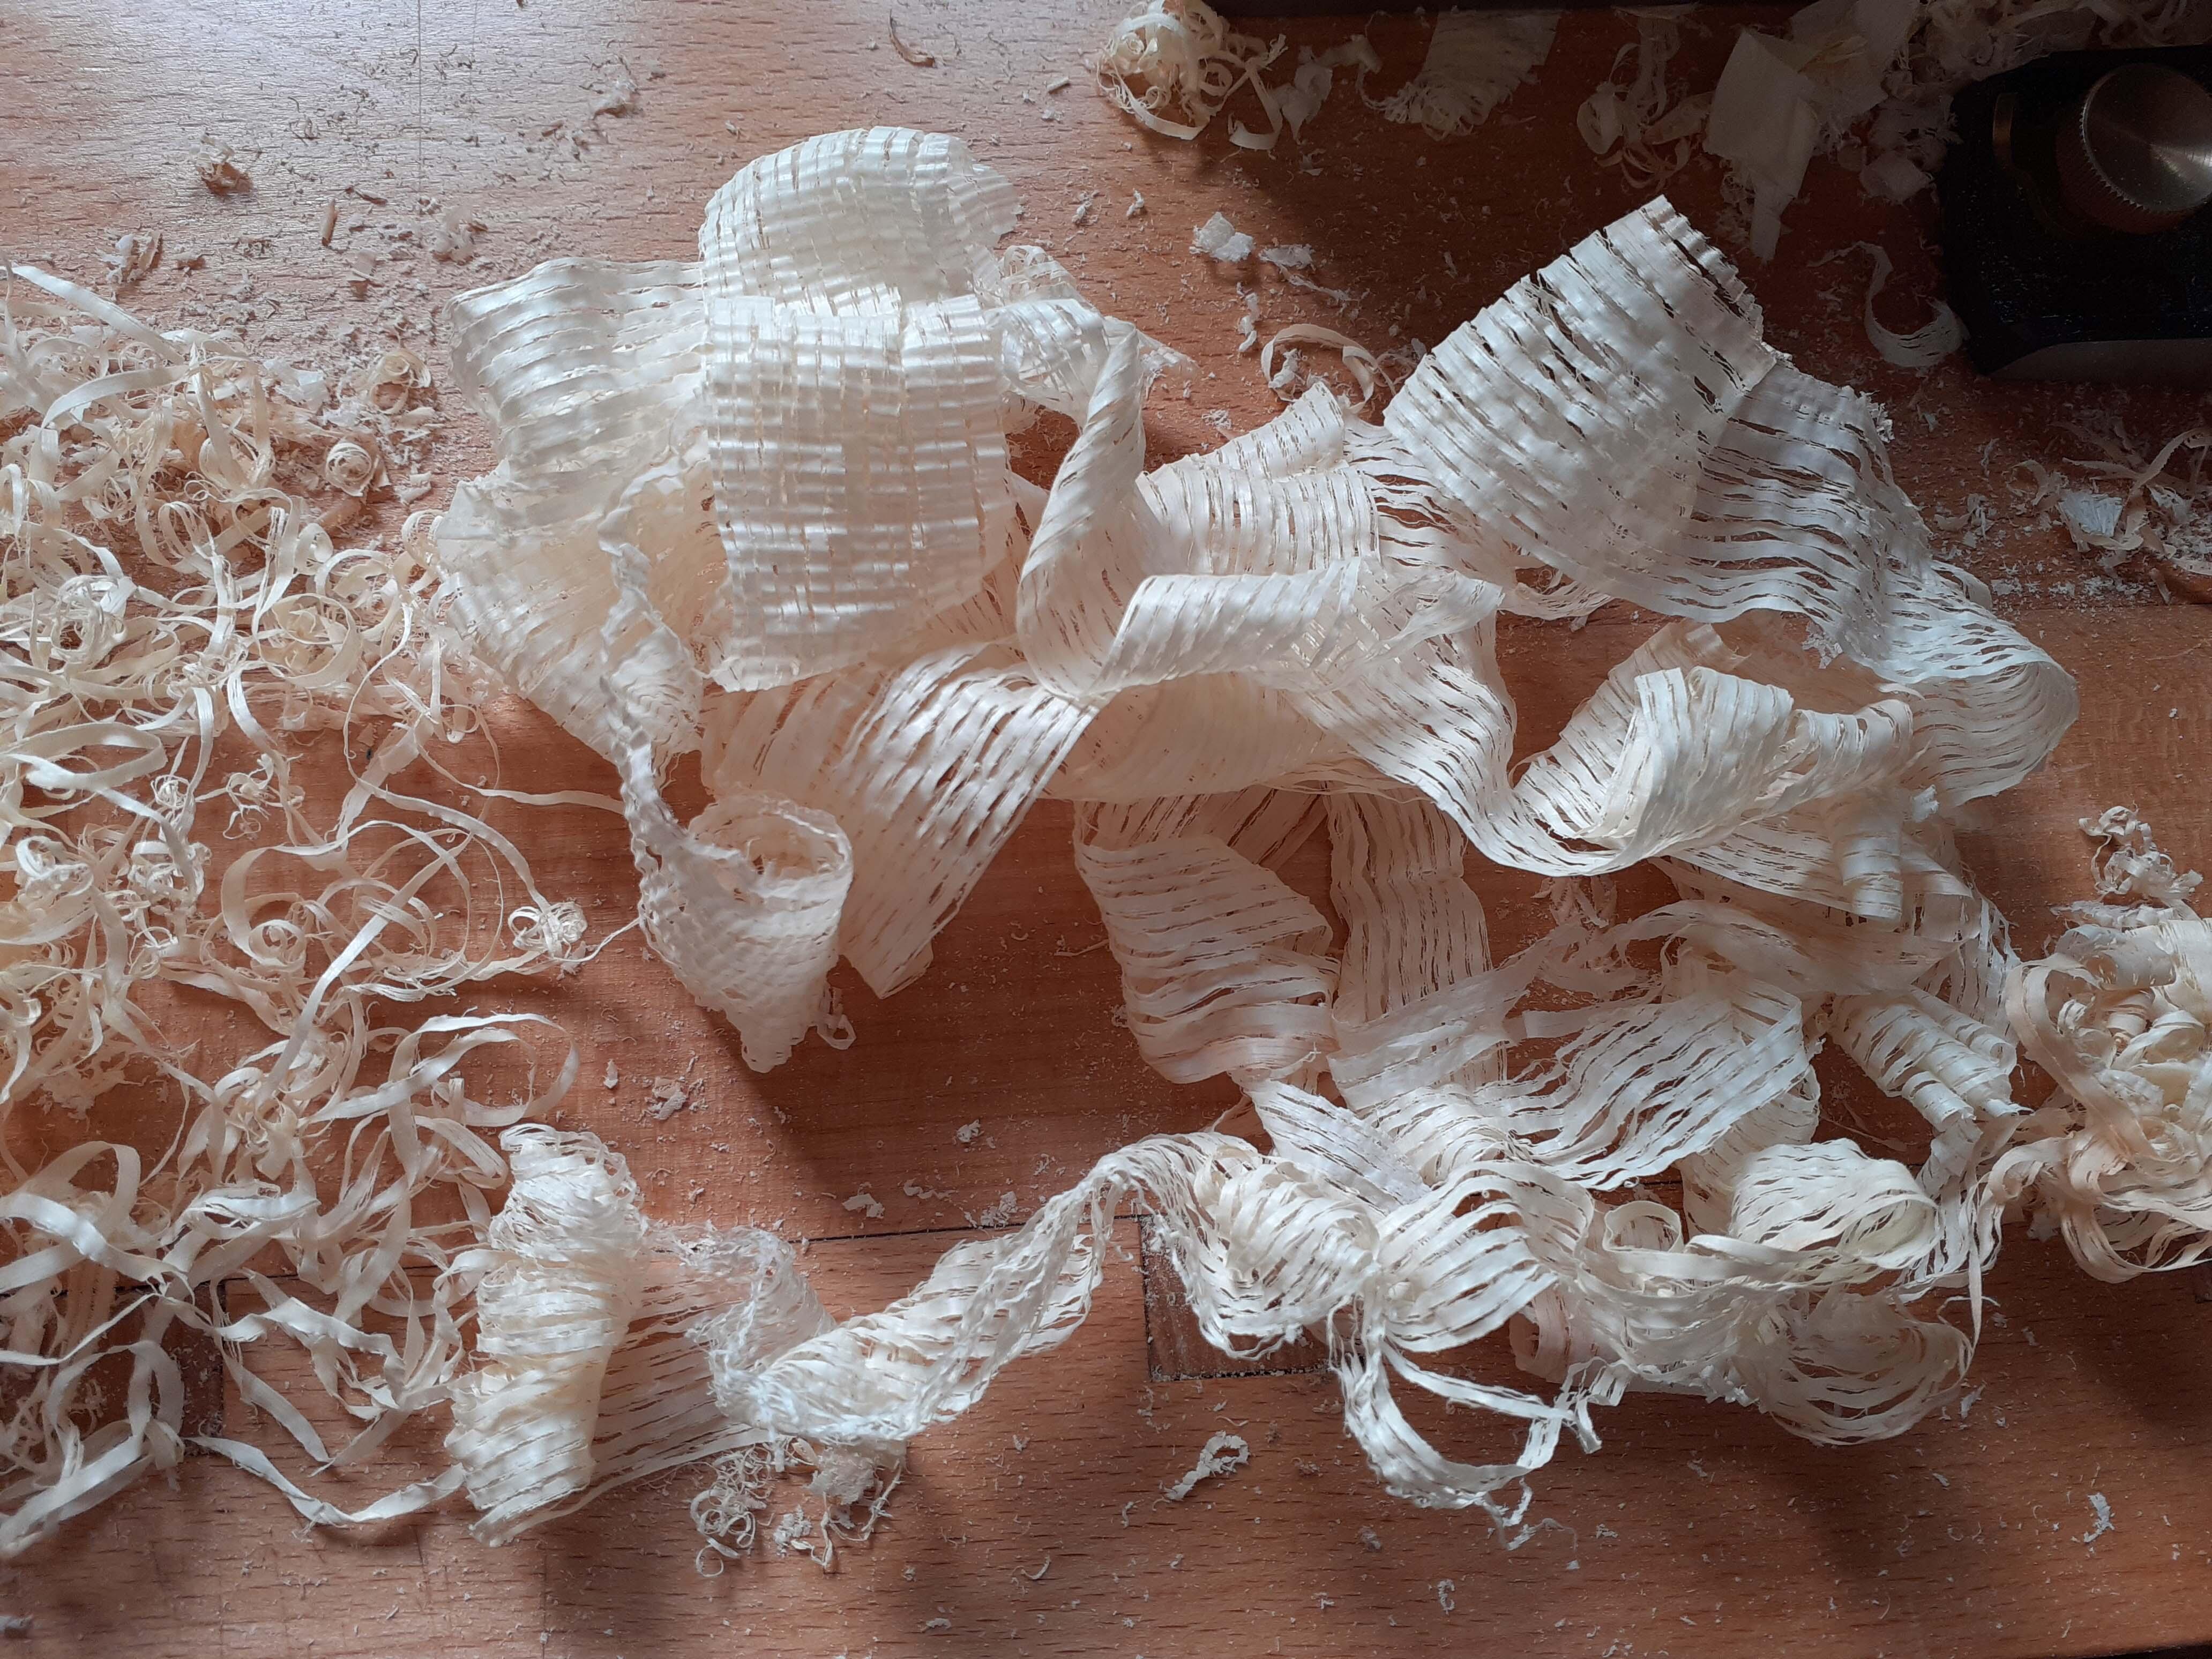
 1 point1 point1 pointAsh plank, finished entirely with hand tools (planes and scraper). Well, not quite true, I dimensioned it using machine tools (radial saw and planer/thicknesser), and then moved to hand tools. Second pic is paper thin plane shavings from the process. This thing, once it has a coat or two of something to be determined, is a coat rack!
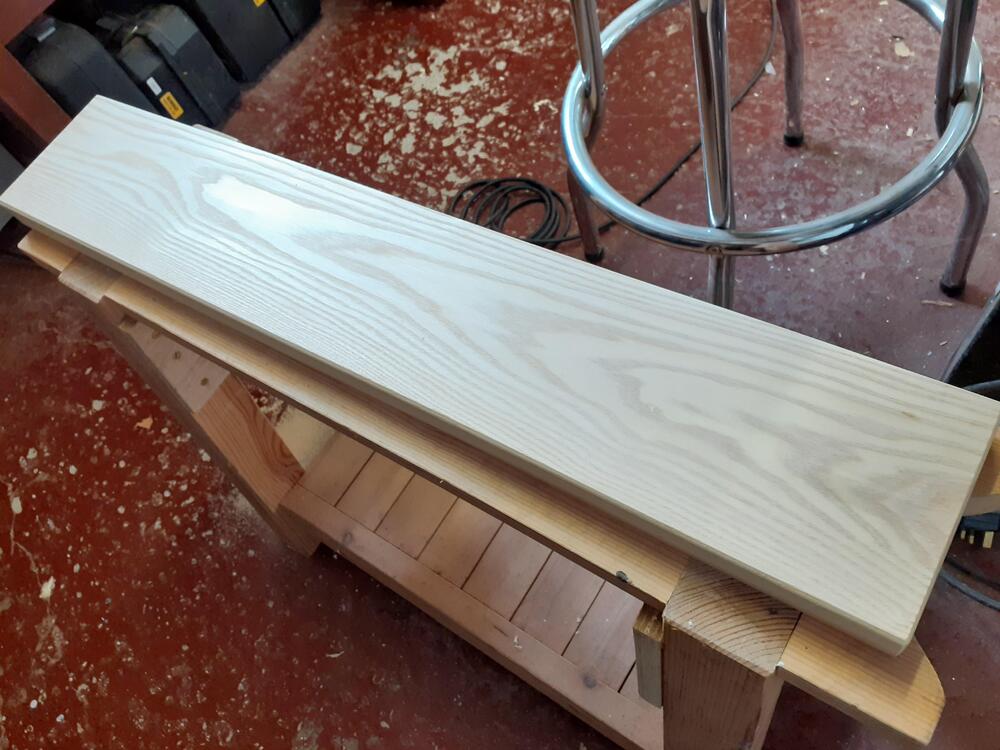
 1 point


Important Information
By using this site, you agree to our Terms of Use.
Account
Navigation
Search
Configure browser push notifications
Chrome (Android)
- Tap the lock icon next to the address bar.
- Tap Permissions → Notifications.
- Adjust your preference.
Chrome (Desktop)
- Click the padlock icon in the address bar.
- Select Site settings.
- Find Notifications and adjust your preference.
Safari (iOS 16.4+)
- Ensure the site is installed via Add to Home Screen.
- Open Settings App → Notifications.
- Find your app name and adjust your preference.
Safari (macOS)
- Go to Safari → Preferences.
- Click the Websites tab.
- Select Notifications in the sidebar.
- Find this website and adjust your preference.
Edge (Android)
- Tap the lock icon next to the address bar.
- Tap Permissions.
- Find Notifications and adjust your preference.
Edge (Desktop)
- Click the padlock icon in the address bar.
- Click Permissions for this site.
- Find Notifications and adjust your preference.
Firefox (Android)
- Go to Settings → Site permissions.
- Tap Notifications.
- Find this site in the list and adjust your preference.
Firefox (Desktop)
- Open Firefox Settings.
- Search for Notifications.
- Find this site in the list and adjust your preference.