

Leaderboard


Popular Content
Showing content with the highest reputation on 06/12/22 in Posts
-
12 pointsHad a really good service for my Brother, with an amazing slideshow. Several people told some great stories about him. Just really nice.12 points
-
7 points^^^ Always buy the thing you want to ride, don't really worry about anything else. Me: finally recovering enough to get out for a proper ride in the woods.
 7 points
 -
5 pointsCNC project two nearing completion. I hate applying finishes.
 5 points
 -
4 pointsSteve will not like the timing of this one, because it's one of his favorites. I made Japanese curry with chicken, potatoes and carrots using the frozen curry blocks I made a couple of years ago. The blocks did not suffer from their long rest, and I have a few more blocks, so I can make it again when Steve is here. 😁
 4 points
 -
4 pointsDamnit guys. After seeing your posts ^ I was intrigued and started looking at reviews. Yesterday I had some time between my Niece's commencement at Portland State and a celebratory lunch @ Salty's so I stopped at River City Bicycles and test rode one. Bam. Done. I ended up going with the 2021 model to save a few bucks & because I actually prefer the display up on the handlebar (even though I know it's a much less sophisticated display than the ones on the 2022's). Those are just excuses for the real reason though: I like the color. I will definitely be getting the extended battery once they are available 😁
 4 points
 -
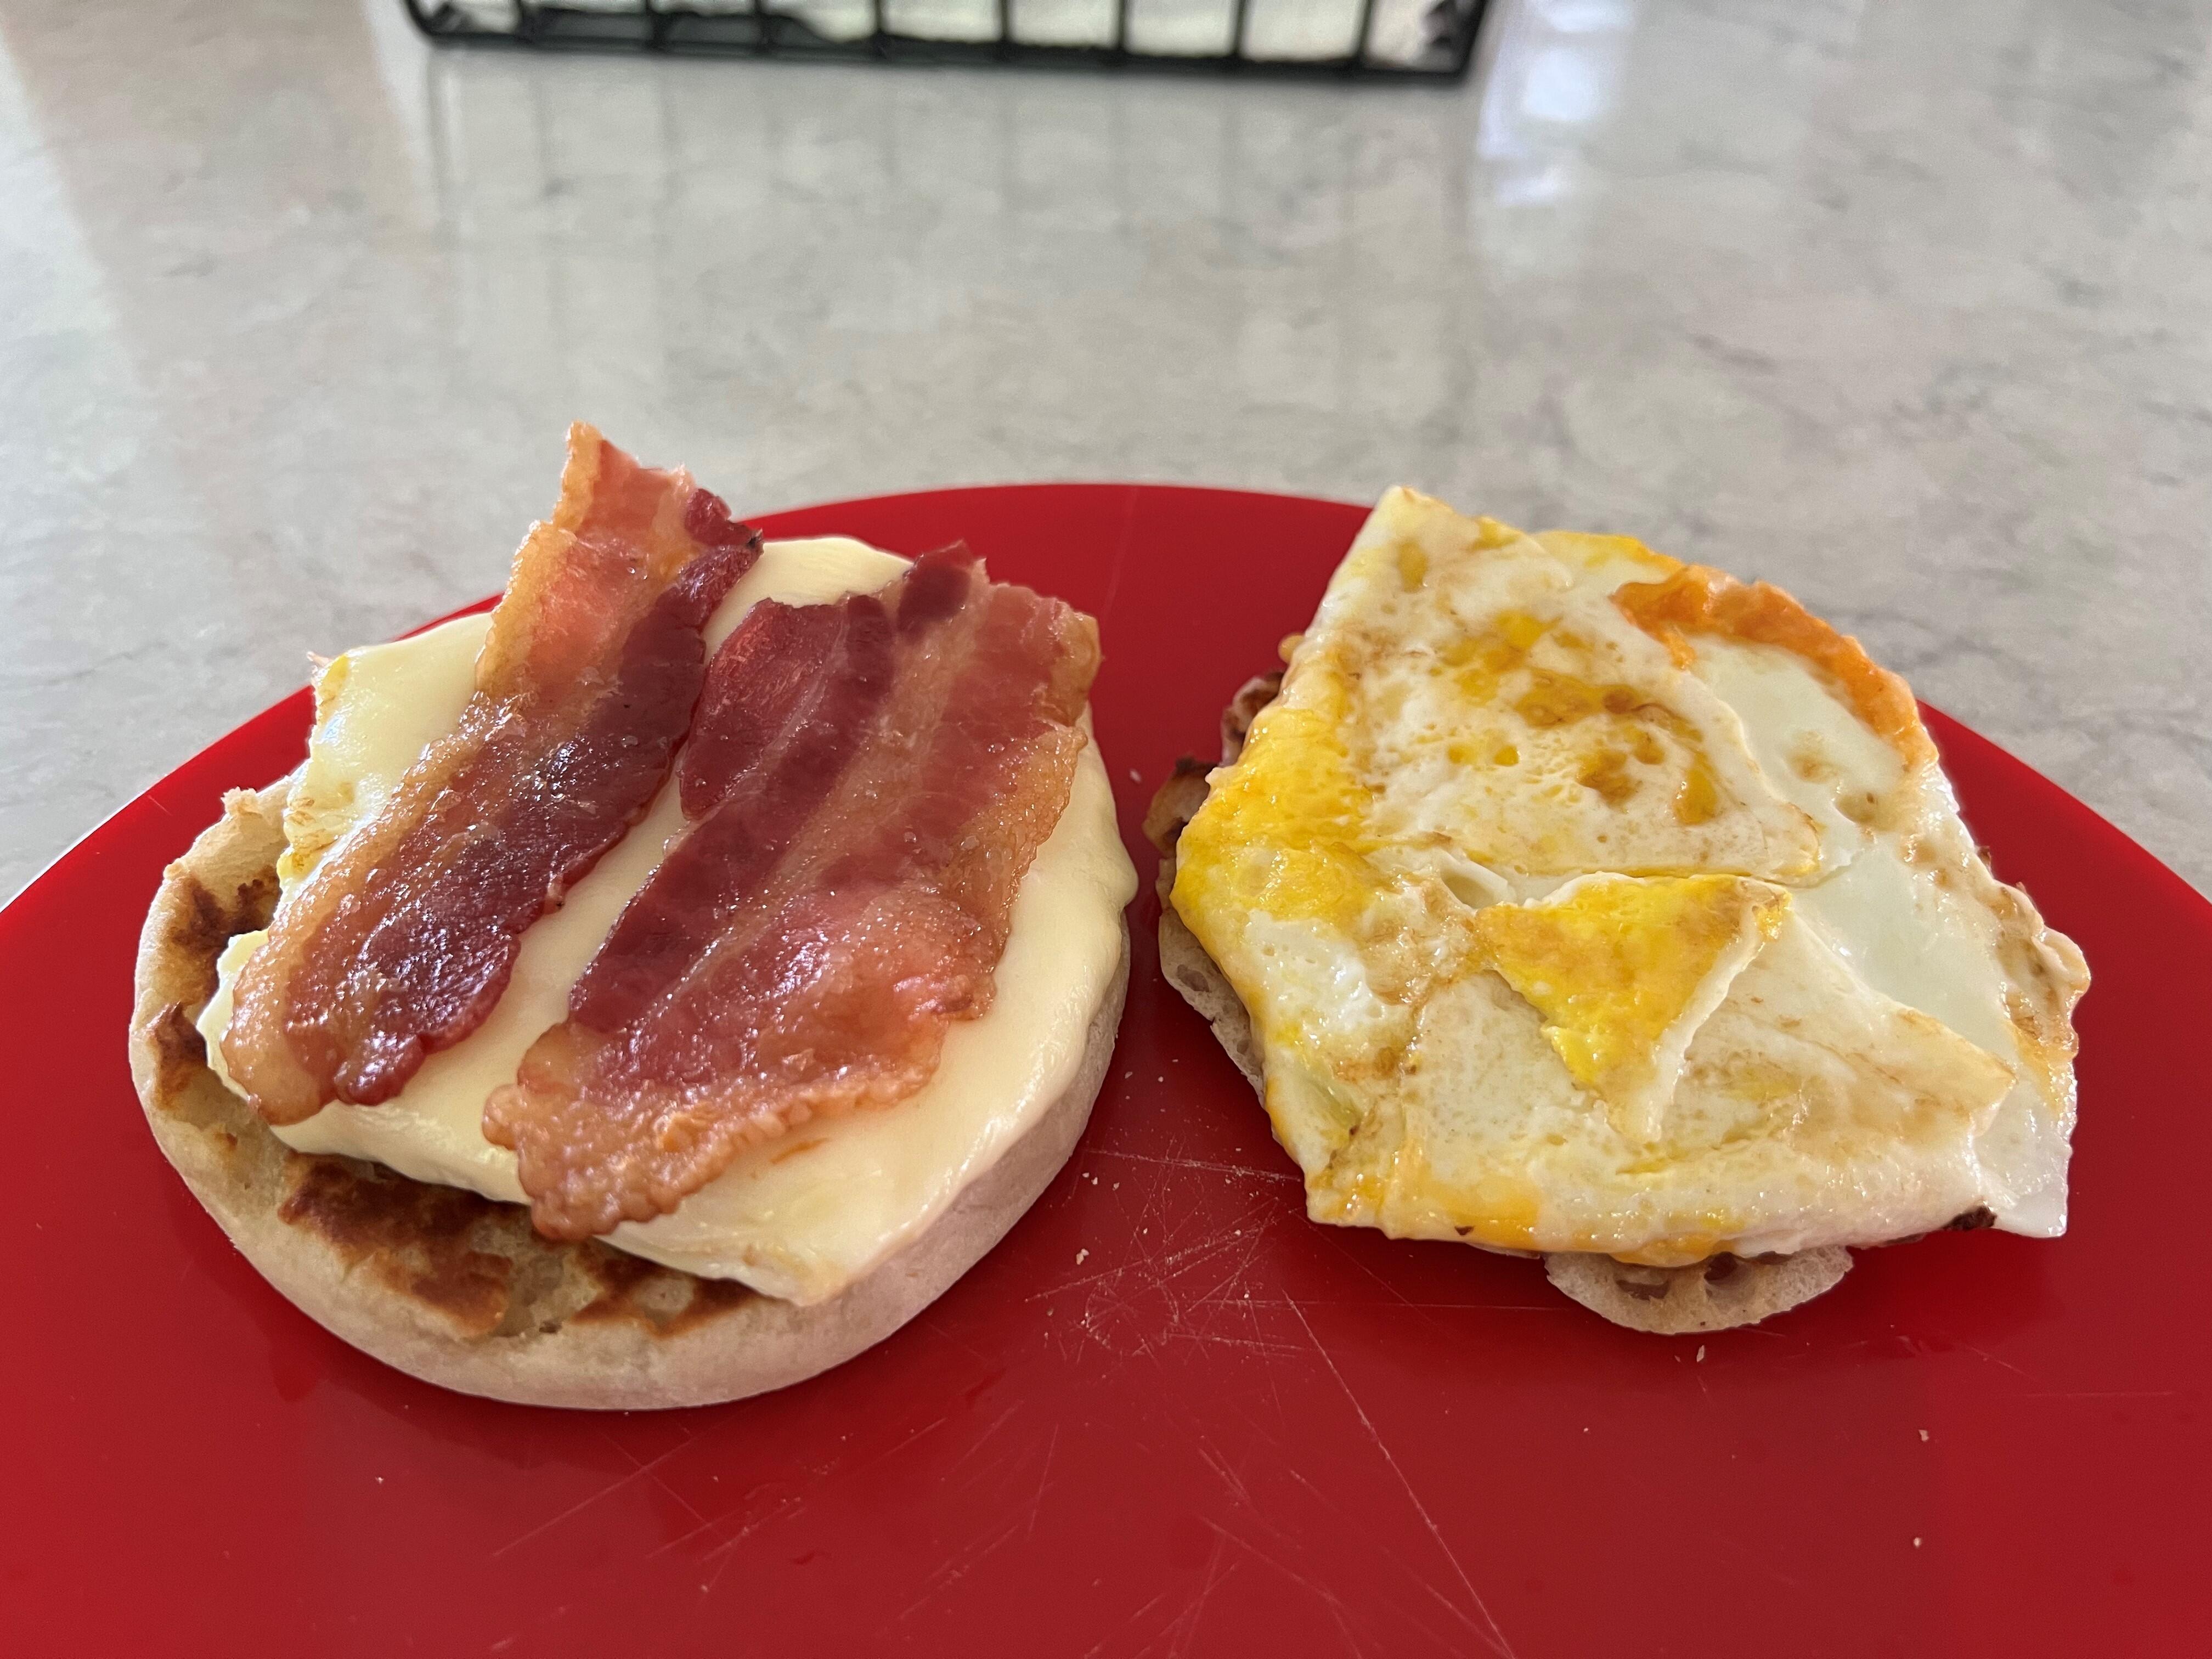
3 pointsTwo-egg breakfast sandwich after an early morning bike ride.
 3 points
 -
The Voice Of Love Julee Cruise 1992 https://album.link/i/358066013 Example: Haunting goodness - RIP3 points
-
3 pointsI'm so hetero when I'm in Alaska. Yes, that's me manning the grill. Fake it till you make it!
 3 points
 -
I could not help but notice that the dead tree carcass machinists have a thread on wood machining. But dead trees do not make the best cases for stax amplifiers. So i'm a little surprised that there is no thread dedicated to CNC machining metal. The motivation for this thread was that I turned 50 years old a few weeks ago and for my birthday I decided to buy myself a CNC machine so that I could make my own cases for my stax builds. I decided to buy the foxalien Vasto, https://www.foxalien.com/products/cnc-router-machine-vasto?sca_ref=725103.t6qfXeHAnx based on not much more than I needed to machine 400mm by 400mm and the reviews on youtube are very positive. I'm waiting for delivery so I can't comment on if it is any good and I am a complete CNC newbie so I'm hoping this thread might become popular and eventually contain some advice for people who want to build cases for their amps. regards and best wishes james2 points
-
2 pointsThanks Steve. Did an easy 30 miler on the road bike this morning and felt more than ok. A little tired now so I'll take it easy for the rest of the day and try not to push back.2 points
-
2 pointsSee if this link works for an NYT article and recipe for the blocks. There is a quick recipe for stew at the end and I then below is a link to a chatty article and recipe from Serious Eats that gives more ideas and a same day recipe for making a stew without freezing blocks. I use more blocks than the NYT recommend when making a stew for a thicker and stronger curry. https://www.nytimes.com/2019/09/11/magazine/japanese-curry-bricks-recipe.html?unlocked_article_code=AAAAAAAAAAAAAAAACEIPuomT1JKd6J17Vw1cRCfTTMQmqxCdw_PIxftm3iava3DEDm8biOEcDIGS-kHAIqhqf9I10i-WAdRcKqU-AfZoz-RcJAl3RgKpupbCmIgAJ299j7OPaV4M_sCHW6Eko3itZ3OlKex7yfq15UzWaGfuD7iL13BwOApjoJJ6fAyv32gKz63AEeV13tEv1fsxF9stE2d7ESqMufTjDRR6O8zXLU2Pr1lrBJwKHG3bjtWe6LkfcQpNCVmgTH934G406Ns0K8pAde-kbEZmIJyi9O1XXm94L46pBIkzQZzXlNhptb3PqR-PyKmm1jBJ2c8K-tiwtgU6zzsqALE&smid=url-share https://www.seriouseats.com/japanese-curry-kare?utm_term=Homemade+Japanese+Curry+Rice+Kare+Raisu&utm_campaign=Daily+Serious+Eats&utm_medium=email&utm_content=Daily+Serious+Eats+CID_e62341909ff40d2045f766a2cd972db3&utm_source=Email+campaign2 points
-
2 points
-
2 points
-
I vote for a Denon D9200. More discrete looking than the ES-R10. Really efficient and great sounding too! I still find the ES-R10 better but I don’t think it is suitable as an office headphones.
 2 points
 -
2 points
-
If you like Tori Amos/Kate Bush then you will more than likely like this
 2 points
 -
2 pointsI bought an e-bike. Specialized Turbo Vado 5.0 Super Light 2022 edition. Claire got a 4.0 step-through.
 2 points
 -
1 pointINGREDIENTS FOR THE SPICE MIX: 1 (2-inch) cinnamon stick, pounded into small pieces 1 dried bay leaf 1 tablespoon brown mustard seeds 1 tablespoon coriander seeds 1 tablespoon fennel seeds 1 tablespoon cumin seeds 1 teaspoon fenugreek seeds ½ teaspoon whole cloves 2 cardamom pods 1 dried shiitake mushroom, broken into pieces 1 (1-inch strip) dried kombu, cut into bite-size pieces 1 ½ teaspoons whole black peppercorns 1 orange, zested 1 tablespoon ground turmeric 1 tablespoon ground ginger 1 tablespoon sea salt 1 teaspoon sweet paprika 1 teaspoon cayenne pepper, or more to taste FOR THE ROUX: 1 ½ cups/340 grams unsalted butter (3 sticks) 2 ¼ cups all-purpose flour Add to Your Grocery List Ingredient Substitution Guide PREPARATION In a large skillet, toast cinnamon, bay leaf, mustard seeds, coriander seeds, fennel seeds, cumin seeds, fenugreek seeds, cloves and cardamom pods over medium heat, stirring until fragrant, about 2 minutes. Be careful not to burn the spices. Transfer the toasted ingredients to a spice grinder. Add the mushroom, kombu and peppercorns to the spice grinder, and grind at the highest speed for 30 seconds. Shake the grinder a couple of times as you blend to make sure the cinnamon stick is pulverized. (You can also grind the spices in batches, if necessary.) Transfer the pulverized spices to a small bowl. Add the orange zest, turmeric, ginger, sea salt, paprika and cayenne pepper. To make the roux, melt the butter in a large saucepan over medium-high heat. When the butter is nearly melted, lower the heat to medium-low. Gradually whisk in the flour, and cook, stirring constantly, until the roux turns light brown, 15 to 20 minutes. Be careful not to burn the roux. Turn off the heat, add the spice mix and stir until well combined. Divide the mixture among three mini aluminum loaf pans, adding about 3/4 cup per loaf pan, or transfer the entire mixture to a parchment-lined quarter-size sheet tray. Let cool for a few minutes at room temperature, then transfer to the fridge so the bricks can solidify. Once firm, unmold, cut each brick into 9 small curry brick cubes (or, if using a sheet tray, cut the mixture into 27 pieces total) and wrap tightly in plastic wrap. Store in the refrigerator for about a month or in the freezer for 3 months.1 point
-
1 pointGlad for a good service....memories are a blessing, keep them close and always remember the good.1 point
-
1 point1 point1 point1 pointRegina Spektor - Home, before and after Technically not out yet (24JUN) but two tracks were available on Tidal so why the heck not?1 point1 point1 pointI'm really fortunate to have the Trackhawk, TMoney...thank you. Liking how low maintenance it is especially driving it around TX and not having to worry about potholes nor clearing parking stops, etc... It's funny that you mention the Porsche Turbo.... I'm starting to fall in love with a 2007 Turbo stick car. It's a bit of a project...60k miles and a lot of love bites. The interior is a bit of a mess and I'm working on sorting it out...got a used passenger side door card I need to install. The car is a lot more enjoyable than I expected... HS1 pointI've hardly taken photos in the last however many years, but what I have been doing since I got this shiny M1 Macbook Pro is blowing the dust off my editing skills. July 1, 2006, the first week I had my EOS 30D and its "better" kit lens. October 4, 2006. Taken by a friend of mine with his Kodak V570 panoramic camera. A photo taken by an unknown person with an Olympus C3040 Zoom point & shoot, sometime in 2001. I found it in a folder of images all from the 00s that I had not thought about in over 15 years. I'm not entirely sure how I ended up with this one, but I suspect the woman in frame sent it to me in hopes I'd clean it up. Well, here I am a decade and a half later. The original jpeg was quite a mess: low resolution (far below the C3030Z's native 3.3MP), poorly exposed, set to sepia tone (ugh), and with a couple digital glitches in it. I fixed ...most of the problems. I ran it through Topaz Labs' Gigapixel AI software, which upscaled it hugely, then converted it to black & white in Photoshop, manually adjusting the settings. Finally I did a bit more work on the levels. I did not attempt to fix the jpeg glitches, but a friend of mine stepped up and made use of his Photoshop skills. I actually like the photo now, as a character study. May 26, 2008. This chucklefuck destroyed a tube guitar amp he borrowed from me. May 26, 2008. The fella on the left is now a moderately famous YouTuber, known for his extended reviews of the Disney Star Wars films. July 19, 2013. Taken on the side of the road in Hadley, MA. A farmer came by in his tractor, stopped it, got down and yelled at me for trespassing (I was 5' off the road.) I told him I was leaving and got TF out of there. May 19, 2019. IR 5D + 17-40L @25mm. I spent considerable time editing this photo then prompty forgot about it. November 6, 2021. Two antique lamps I restored plus a network switch. iPhone 6S. December 21, 2015. Same lamps during the day. May 18, 2019. IR5D + 17-40L @25mm. April 27, 2022. iPhone 13 in an Aldi Parking lot during the golden hour. July 6, 2008. Taken at a party in a club in Springfield, MA where I only worked once. April 25, 2019. Taken with my IR-modified 2001 vintage Canon PowerShot G2 and a wide angle adapter. I cleaned it up using Topaz DeNoise AI then loaded it into Luminar 4 where I made a bunch of tweaks and applied a lookup table. Lastly, I did a bunch of further editing in Photoshop. I did not attempt to correct the somewhat comical fisheye effect caused by the wide angle lens. It doesn't bother me too much. April 17, 2019. iPhone 6S. No edits at all. Februray 18, 2019. Very odd light in my yard. iPhone 6S. May 6, 2019. IR 5D + EF 50mm F/1.8 (Mark I). The sleepy little street I live on. Oct 9, 2009. The absolutely ancient mixing console from a now-closed nightclub. A re-edit of a photo I took with the mighty Canon EF 85mm F/1.2L USM that a friend rented and let me borrow for one evening. The 85L is one of those magic lenses that lives up to and even exceeds the hype surrounding it. Revisiting the image, I de-noised it using a Topaz plugin in Photoshop, made adjustments and applied a lookup table in Luminar 4. Then I imported the photo back in to Photoshop, further adjusted the levels and did a de-noise pass to remove posterization artifacts. There is "narrow depths of field" then there's "85L depth of field."1 point1 pointGarden Party Afternoon Tea, To Celebrate The Queens Platinum Jubilee There were savourys And later, Sweets Which I availed myself of.


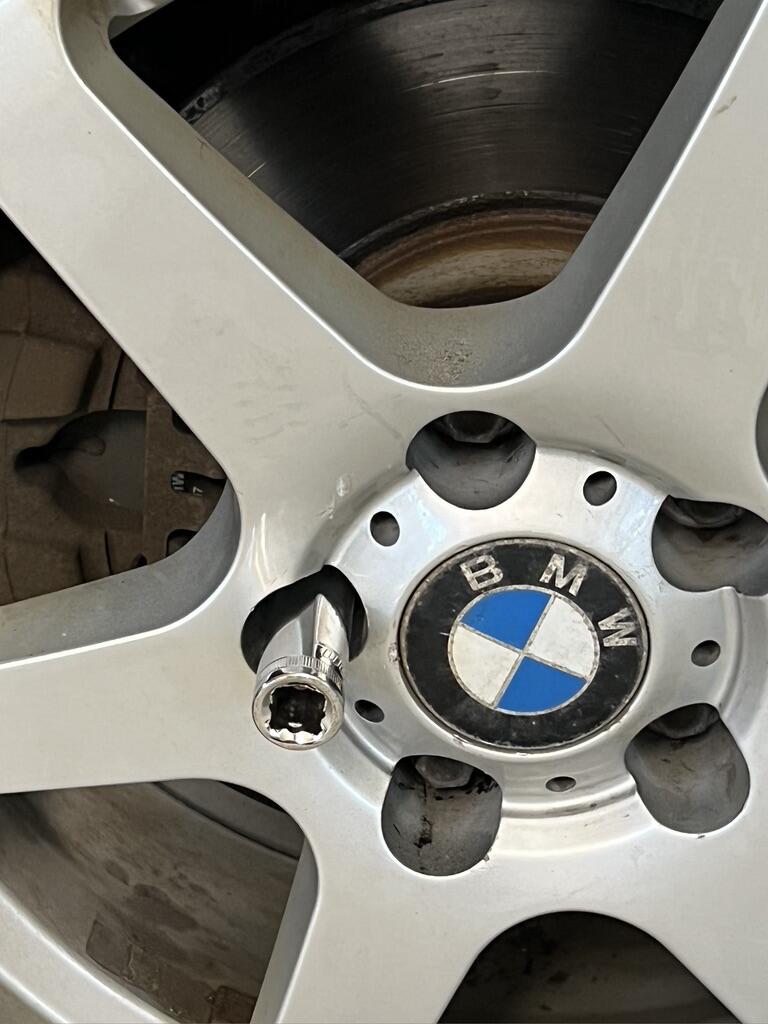
 1 pointMy build uses the latest board version that uses PZTAx6 SMD parts. Power supply is 2 GRLV set for +/- 30VDC rails with 2 100VA transformers. Here are the detail steps I went through to adjust and bias my Dynahi. I gathered the information from reading this thread and other Dynahi build discussions on the web. Also consulted Kevin and reference the schematic. I hand measured and matched all resistors, LEDs and transistors before soldering. I only matched the output devices (MJF15030/MJF15031) at very low current but this seems to work out fine at the actual working current (75mA). I replaced one that was about 5% off. The rest are all within 1.5 % of each other. I use matched 2SK170/2SJ74 pairs to replace the THAT340. They are BL grade. Feedback resistors (R52, R56) are 50K (200K on silkscreen) and I use 100R for R23, R24 (50R on silkscreen), 680R for R1, R4 (500R on silkscreen). This combination of R1/R4, R23/R24 works great for my target bias current of 75mA per output device. To bias the output devices for the desired current, it’s necessary to pick the right combination of R1/R4 and R23/R24. Higher R23/R24 resistance increases bias current while higher R1/R4 resistance shifts the bias adjustment range downward. As Kevin has warned more than once, do not test this amp without proper heatsink. The MJF15030/15031 is only rated at 2W maximum dissipation in 25C ambient temperature. I took the following steps to bias and adjust the amp: Step 1 - before powering up the amp: Set RV3 and RV4 in their exact middle value. The Bourns trim pots I use have a 10% tolerance. I measured R9/R10, R11/R12 (100R resistors on top and below RV3 and RV4) to ensure RV3 and RV4 are both centered. RV3 and RV4 are located on the PCB right next to the THAT340. Set RV1 and RV2 to their maximum resistance so the amp is biased at the lowest possible output current. I did this by measuring the resistance of R1 and R4 (the 500R on the PCB right next to RV1 and RV2). On my amp, they are about 640R. On my build, I mounted RV2 backwards (in regard to the silkscreen) so turning both RV1 and RV2 adjustments clockwise decrease their resistance. Step 2 – power up check: Power on the amp and measure bias current (indicated by the voltage drop across the bank of 20R resistors) and output DC offset. With my amp at cold start and before any adjustments, the bias current is about 34mA and the output offset measured to ground is -1 VDC on one board and -0.5 VDC on the other. The DC offset between O+ and O- is 19mV and 25mV. This step is a sanity check to see if anything is out of whack. Let the amp warm up to steady working temperature before proceeding to next step while taking periodic measurements and checking the heatsink temperature. It takes 30 minutes or more for the amp to reach steady temperature. For the following steps, make the adjustments slowly and gradually and allow time for the amp to settle following each adjustment. Step 3 – compensate for transistors mismatch in the input stage: Adjust RV3 and RV4 so the voltage drop across R7 and R8 are the same and the voltage drop across R13 and R14 are the same. This adjustment is tricky and delicate. Adjusting either RV3 or RV4 affects the voltage drop across all 4 resistors (R7, R8, R13, R14). Also the adjustment is made to a 10K trim pot (pre-adjusted to 5K) parallel to a 100R resistor. The resistance change is relatively small at first in relation to the turns of the trim pot. I adjusted RV3 and RV4 in small and equal amount in turn to get to equal voltage drop between R7/R8, R13/R14. Be patient and be careful! This adjustment affects the DC offset between O+ and O-. Step 4 – biasing output sections: Decreasing the resistance of either RV1 or RV2 will increase the current of ALL the 16 output devices on the board. At the same time, decreasing RV1 resistance will push the output DC offset (measured to ground) more negative while decreasing RV2 resistance will push the output DC offset more positive. Adjust RV1 clockwise to increase the bias, say 20mA at a time. The output DC offset to ground will go more negative at the same time. Then adjust RV2 clockwise (CCW if RV2 is mounted in accordance to the silkscreen) to bring the output DC offset close to 0mV (the bias current will increase at the same time). Repeat these two adjustments back and forth until you reach your desired bias current while keeping the output offset as close to 0mV as possible. The offset between O+ and O- is not affected by RV1/RV2 adjustment and will remain very stable through the process while the offset to ground will drift quite a bit. It’s normal. Step 5 – nulling the offset between O+ and O- if needed and/or desired: Adjust RV3 and RV4 in a convergent fashion (one clockwise, the other counter-clock wise) to bring the offset between O+ and O- to 0 V. I consider this step 5 optional unless the offset between O+ and O- is excessive and cannot be taken care by the servo. I did not do step 5 on my amp since, following step 3 and 4, without the servo, the offset is steady at 23mV on one channel and 25mV on the other and not likely to hurt anything. I can always engage the servo if desired. I have tried other methods of adjustment including one that skipped Step 3. The difference is that, with step 3, I end up with more uniform bias current across all 16 output devices, generally within 1.5% of each other. When I skip step 3, while the current between the PNP and NPN banks on each phase is within 1.5% or so, the current variance between non-inverted and inverted phases is about 8%. I did not try very hard but frankly my wooden ears could not tell the difference between the outcome of the two methods. Maybe someone with a scope can see the difference. I also consulted with Kevin and he does not feel strongly if there is a right or wrong method either. One more thing, this thing runs hot! By my calculation, running +/- 30VDC rails and 75mA bias, each output device is dissipating 2.19W. That’s about 35W of heat needing to be dissipated by the heatsink per board. It’s a monster of a headphone amp!1 pointIt might also be helpful to have Kevin's voltage and current measurements in this thread as well. Reposted from the other site: Voltage More added later Current1 point0 points0 pointsI hear you on dealer/appointment troubles. I've had a lug nut (technically a lug stud) stuck on the BMW for the last two weeks. The previous shop installed them to what I'd guess was well north of 200ft-lbs of torque. I got 19 of 20 off with only minor problems using an 18" breaker bar and a 3' extension. The 20th, it's still on there and no amount of heat or other method will loosen it. It's now well and truly stripped. Yesterday's adventure was to heat it as hot as I dared and drive a 16mm socket on it (it's a 17mm head) and let it cool for more than an hour. Still wouldn't budge. So I tried JB welding a socket on. Nope, the glue broke before the socket moved. So now I wait over a week to get a tire shop to look at it and probably spend several hundred dollars having it drilled out or who knows? Maybe I just trade the car in...
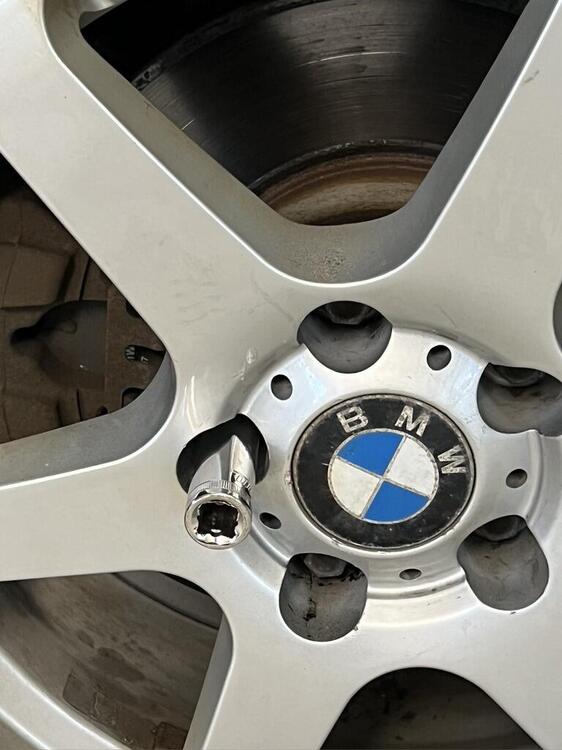 0 points


Important Information
By using this site, you agree to our Terms of Use.