Kerry
High Rollers
-
Joined
-
Last visited
Everything posted by Kerry
-
Nice. I want to squeeze this project in next. Glad you got the servo working
-
Happy Birthday Wachara!!!
-
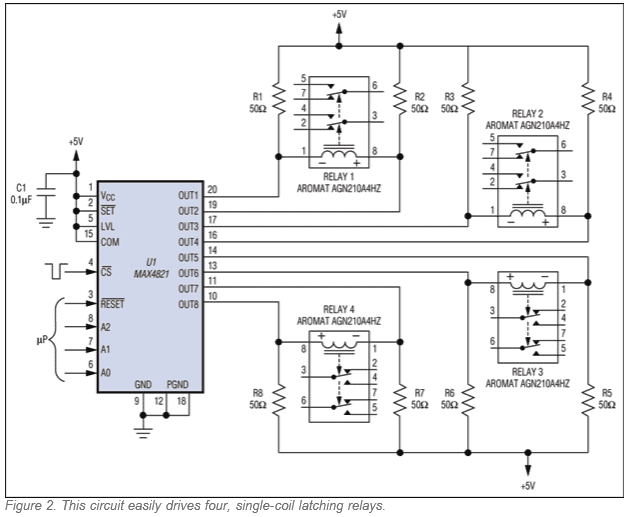
The relays are single coil and require a voltage in one direction or the other to toggle position. In order to accomplish this the circuit uses two output pins per relay on the MAX4820 chip. In the example below from the MAX4821 documentation (APPLICATION NOTE 3288), see how the 50 ohm resistors sit in relationship to the relay. When you toggle OUT1 low (keeping OUT2 high) the 50 ohm resistor will see a little less than 5 volts (I forget the exact value) across it and about 100mA. That gives about .5W (I used 4.5V in my math above). R2 will see much less power across it. To toggle in the other direction you would set OUT2 low leaving OUT1 high. These pulses are very short (a few milliseconds). By default everything is set high and there is very little power consumption. I've had some programing issues and accidentally left some pins low. The resistors get hot quickly but can stay in that position without damage.
-
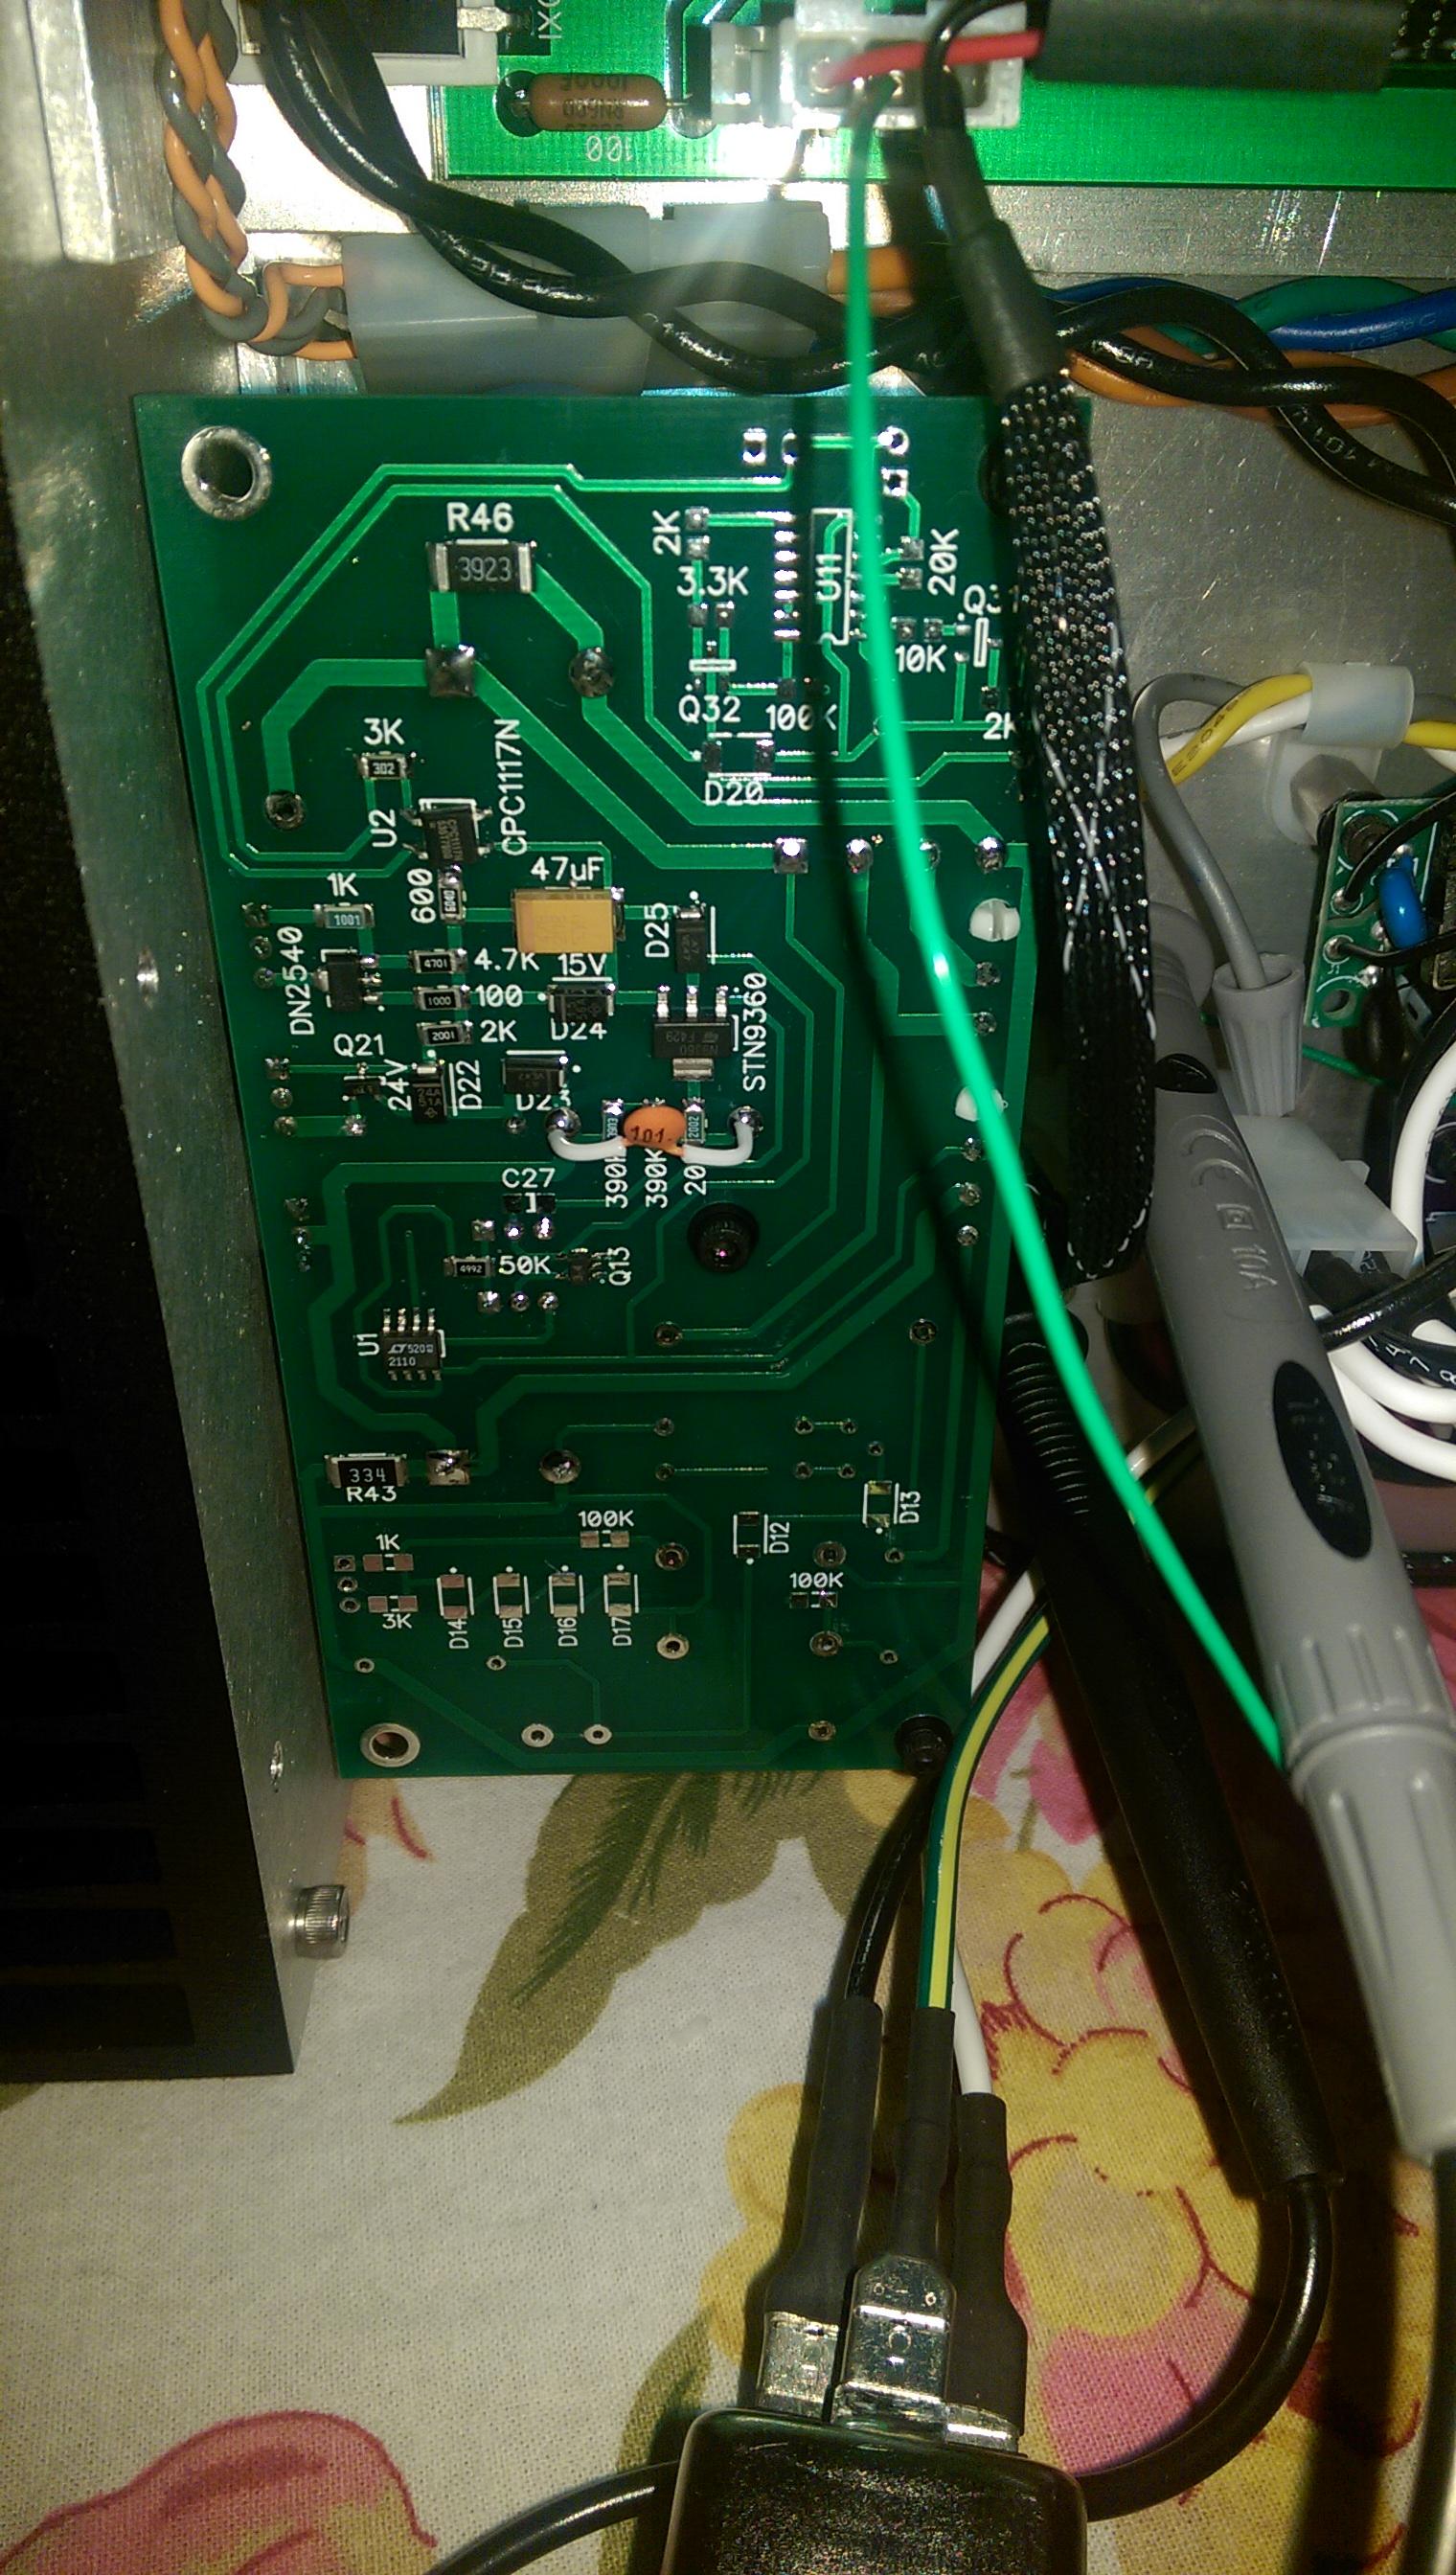
The 32 x 50 ohm resistors need to be this ERJ-P08F51R0V. They are thick film and handle .66W. The minimum rating for this resistor needs to be .4W.
-
Hi Les, I've used ones similar to these: 1.3" OLED 1" OLED The code will support I2C and SPI interfaces.
-
-
-
I love your mind and 3D printer
-
That's it. I just needed something small and wanted to use the Antec transformers and have the HV delay. Works perfectly on my Blue Hawaii. I've been listening to it for the past couple of days. Really nice to have it back in service. I'm in the middle of re-casing it. EDIT: This is the negative rail so no control logic (just the relay - CPC1117N) and no bias supply.

-
-
The class DATTN will support the new board as well, but needs some tweaking since I had the first rev of the new boards.
-
-
Agreed. Beautiful work Doug!
-
-
-
Well stated! It really helps to use solder paste and a heat gun. I did all of the resistors and low profile parts then I place the relays and then use a straight edge to get them perfect. You can solder with an iron but it takes a lot longer.
-
@mwl168 - where'd you get the purdy black sockets?
-
Wow very sad to hear. Too many greats leaving us.
-
I was thinking it should have a web interface and possibly a universal app to remote control it. I'm thinking with the pi it could read from dlna music servers if people would want to embed a DAC.
-
I'm writing some arduino based code that supports the original boards as well as the new generation. I also have code for a small oled display as well. I'd like to like at some raspberry pi based code as well which would give some nice interface options including Bluetooth on the pi 3. I'm traveling (Birmingham, UK) at the moment but could post the current rev of the code I have once I get back.
-
-
At 25VAC that's a dc drop of 20 volts less the bridge. At about 10mA+ that's a bit too much heat. I would change the windings. 18VAC is more than enough.
-
I love what you bring to this sport! Nice job Joachim
-
Nice! I love that you have a light fixture mounted inside the chassis
-
Happy Birthday Nate!