

Leaderboard


Popular Content
Showing content with the highest reputation on 03/04/21 in all areas
-
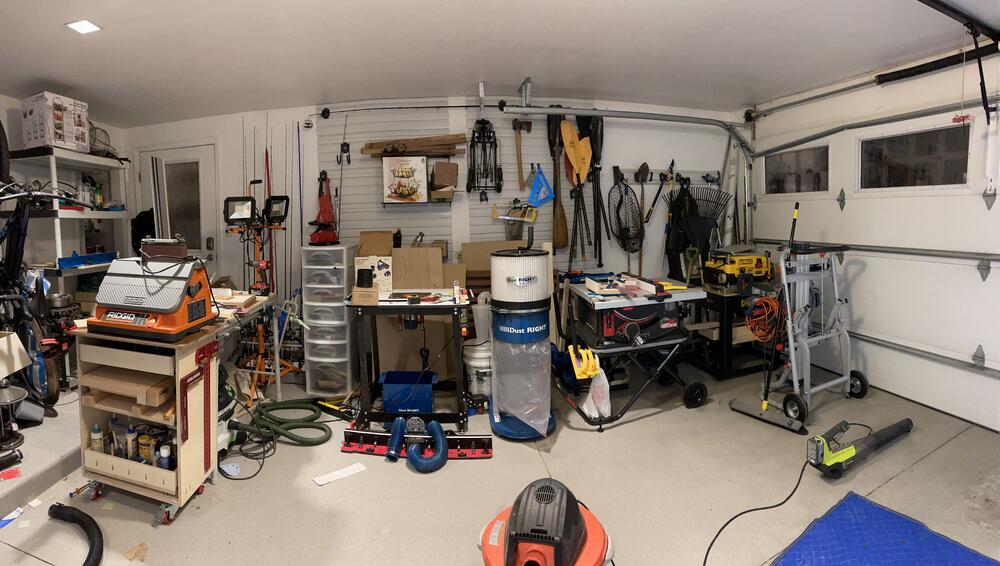
3 pointsI am going to flip the router table tonight so I can screw on the Dust Right box tomorrow when I get some screws. Not sure I can fit anything else in my shop at this point.
 3 points
 -
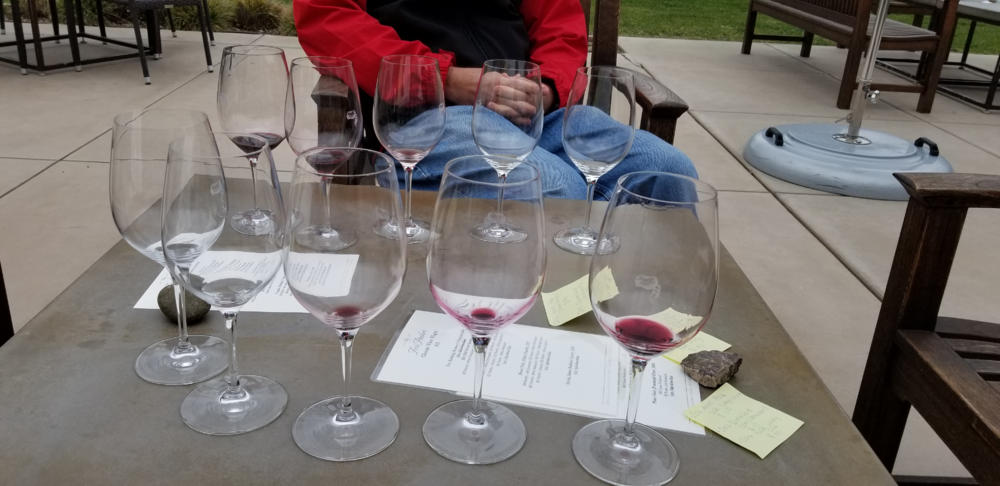
2 pointsActually yesterday, and you can probably guess why I did not post this yesterday. Third of four tastings done in Los Olivos.
 2 points
 -
2 pointsMatching P channel and N channel is very challenging even you have a large supply of both. Agree with Pars that it's not really required for this application. If you already use dip socket for the THAT340 you can simply plug in the SK170/SJ74 into the dip socket with some leg bending. There should be some photos showing how this is done in the Balanced Dynahi build thread. found the photo so I'll show it here...
 2 points
 -
2 points2 pointsIn progress Amp design by me, power supply designs and circuit board layout by kerry, support by birgir +/-300 volt power supplies. complementary push pull all bipolar design with cmos style multiplying current mirror.
.thumb.jpg.c68f36a145f58d68a58034aa908867da.jpg) 1 point1 pointMeanwhile ... https://www.theverge.com/2021/3/4/22313108/square-inc-tidal-majority-stake-jack-dorsey-jay-z1 point1 pointDat kick.1 pointStrangest camera cuts I've ever seen here. I wouldn't say these guys have aged like fine wine, but they are still fun to listen to.1 point1 pointWhen I used the Linear duals, because of cost, I didn't bother matching them N to P. Kevin has said the CCS takes care of it anyway. If doing singles, if you can get them matched including N-P without a huge premium, I'd do it.1 pointI like the wireless II’s a lot, the app is solid and very intuitive, the sound improvement is impressive, all aspects seem to have taken a performance leap. My main gripe with the first generation beside the shitty app is treble harshness, which is more evident since the II’s arrived. I still like the old version though, it’s doing still doing duties in an upstairs system and sounds great. Not a fan of the II’s matte finish... and titanium looked much better in photos.1 point1 point1 pointAnother Happy belated Birthday Craig!* *or is it just really early for the next one.1 point1 point1 point1 point1 pointI couldn't afford expensive gear when I was young and my ears were good.1 point1 pointThis is a random one: Messer Chups – Magneto1 point1 pointThanks everyone, it was a good day, as long as you ignore work (which one must most days). Dinner with the family was great and Lily baked me a cake which was beyond tremendous. So we'll hope that I'm maybe just reaching middle age and have a bit to go before I hit the downslope.1 point1 point1 pointHappy birthday, Nate! may you be as joyous as your kids always look. (party favour noise)1 point1 point1 point1 point1 point1 point1 point1 point1 point1 point1 point1 point1 point1 point1 point1 point1 point1 point1 point1 point1 point1 point1 pointThe key difference between a toroid and an R-core is primary/secondary capacitance and leakage inductance. R-core has primary and secondary on opposite legs. So the capacitance is low, but the leakage inductance is high. With a toroid, the capacitance is high, but the leakage inductance is low. So an R-core (like a split bobbin EI) is better for not coupling RFI between windings. But the leakage inductance means enough stray magnetic field to cause potential hum problems. A toroid by contrast, because of the tight coupling between the windings, tends to couple RF. But because of the low leakage inductance has a very low external magnetic field. Basically, horses for courses. I've used both types in various bits of my kit. But since I always use an outboard supply (for non-power amp use) either type has worked just fine.1 point1 point1 point1 pointThat's probably for the better, given how fowl-mouthed he is.1 point1 pointHad a nice conversation with a neighbor. He's a bit hard to understand, but more than willing to sit and chat with me. He hung around telling me all about his day for better than 15 minutes.
1 point1 pointMeanwhile ... https://www.theverge.com/2021/3/4/22313108/square-inc-tidal-majority-stake-jack-dorsey-jay-z1 point1 pointDat kick.1 pointStrangest camera cuts I've ever seen here. I wouldn't say these guys have aged like fine wine, but they are still fun to listen to.1 point1 pointWhen I used the Linear duals, because of cost, I didn't bother matching them N to P. Kevin has said the CCS takes care of it anyway. If doing singles, if you can get them matched including N-P without a huge premium, I'd do it.1 pointI like the wireless II’s a lot, the app is solid and very intuitive, the sound improvement is impressive, all aspects seem to have taken a performance leap. My main gripe with the first generation beside the shitty app is treble harshness, which is more evident since the II’s arrived. I still like the old version though, it’s doing still doing duties in an upstairs system and sounds great. Not a fan of the II’s matte finish... and titanium looked much better in photos.1 point1 point1 pointAnother Happy belated Birthday Craig!* *or is it just really early for the next one.1 point1 point1 point1 point1 pointI couldn't afford expensive gear when I was young and my ears were good.1 point1 pointThis is a random one: Messer Chups – Magneto1 point1 pointThanks everyone, it was a good day, as long as you ignore work (which one must most days). Dinner with the family was great and Lily baked me a cake which was beyond tremendous. So we'll hope that I'm maybe just reaching middle age and have a bit to go before I hit the downslope.1 point1 point1 pointHappy birthday, Nate! may you be as joyous as your kids always look. (party favour noise)1 point1 point1 point1 point1 point1 point1 point1 point1 point1 point1 point1 point1 point1 point1 point1 point1 point1 point1 point1 point1 point1 point1 pointThe key difference between a toroid and an R-core is primary/secondary capacitance and leakage inductance. R-core has primary and secondary on opposite legs. So the capacitance is low, but the leakage inductance is high. With a toroid, the capacitance is high, but the leakage inductance is low. So an R-core (like a split bobbin EI) is better for not coupling RFI between windings. But the leakage inductance means enough stray magnetic field to cause potential hum problems. A toroid by contrast, because of the tight coupling between the windings, tends to couple RF. But because of the low leakage inductance has a very low external magnetic field. Basically, horses for courses. I've used both types in various bits of my kit. But since I always use an outboard supply (for non-power amp use) either type has worked just fine.1 point1 point1 point1 pointThat's probably for the better, given how fowl-mouthed he is.1 point1 pointHad a nice conversation with a neighbor. He's a bit hard to understand, but more than willing to sit and chat with me. He hung around telling me all about his day for better than 15 minutes. 1 point1 pointFinally, my mini T2 is completed. Just want to share my build experience and listening impression for those who are about to build one. Also, a huge shout-out for JoaMat, who conceptualised and designed the amp, provided me with invaluable tips when I was debugging my mini T2 and encouraged me to share my experiences here. -------------------------------- Pics or it didn't happen: -------------------------------- Build experience: Before this amp, I have built the Carbon and Grounded Grid, as well as quite a few dynamic amps including the SMD Dynalo. Overall, I am comfortable dealing with electrostatic amp voltages, but I have limited experiences working on dense and tiny SMD boards. I built the SMD Dynalo with a soldering iron, but this method was unsuitable for the Mini T2 due to the density of the components and the fact that I tend to use copious amounts of flux grease when I solder by hand - it would be too tough to clean the flux stuck underneath the tiny components. Therefore, I decided to solder the SMD parts by the solder paste and hot-air gun method. I used 1 set of mini T2 board, 3 through-hole GRHV boards and 1 delay board (warmup.zip). This amp is fast to build so long as you have a decent hot air gun (I got mine from Taobao for around 25 USD), a pair of fine tip tweezers and some patience. I used a stencil to apply solder paste on one side of the mini T2 board first, then populated all SMD components and used the hot air gun to melt the solder paste. It was quite satisfying to see the tiny parts drawn into their rightful place by the magic of surface tension. It took me about 1 hour to complete the SMD soldering for 1 side, so I'd say that this method is really efficient for the number of parts to be populated. The through-hole components and the tube sockets were populated next, and I used some terminal blocks for the power rail inputs. Just be sure to apply jumper wire for the -15V near the servo opamp. Otherwise, you risk seeing 400V at voltage offset, and frying some input tubes. The transformers I used were 130W and 87W for the HV and LV respectively. There is also a dedicated floating 12V winding for the delay board, and separate filament supply windings are used for the power tubes and input tubes for each channel. Voltage rails were pretty standard - +-15V, +220V, +400V and -460V. The warm-up time was set to 25 sec. There is no need to adjust for output current bias as in the Carbon or GG. The balance servo is activated by default, and all there is to adjust is the output voltage offset with respect to ground, and it can be easily adjusted so long as the potentiometers are soldered to the same side as the tube sockets. The amp runs cool. I used heatsinks that measure 7cm tall, 30cm deep, 5cm wide for each side of the chassis. At steady state, the amp module runs at 39 deg C, PSU runs at 35 deg C. In comparison, my 450V 20mA biased Carbon runs at 48 deg C with 15cm-tall heatsinks. Here are some errors I encountered here and the directions I took to debug. They are based on spice simulation by JoaMat. Hopefully, my tips can help builders who encounter similar issues as I did. 1. On power-up, offset voltage rises to 400V immediately after the HV kicked in. Check the jumper connection for the opamp -15v power supply. They are very short and can be easily missed. 2. 50K resistor explodes (either R11 or R12). It is likely due to an unconnected input tube or dead tube. Check input tubes and Q1A/B, Q4/5, Q11/12, Q3A/B of the same side. Also check tube sockets, because even the expensive ones can have loose connection on NOS tubes. 3. Q1A/B burns. This might not be easy to spot. The sign can be as subtle as a discoloration/fading of the silkscreen on the component surface, or a subtle exudation of flux around the collector pin of the component. This is likely due to a shorted input tube. ------------------------------ Sound impressions Take this section with a pinch of salt, for every DIY build is one-of-a-kind, and mine is no exception. For my mini T2, I used Duelund tinned copper wire as input cable, EIZZ stepped attenuator, STAX SPC earspeaker wires as output wires and a 5-pin socket ripped from a STAX extension cable. The headphone I used was the ES1a by ES Labs. I wish I had the Stax flagships to do this impression and comparison. The amp is fed by a AK4497 DAC, straight out of DAC and a coupling capacitor, bypassing any low-pass filters. For the following impression, I used decent tubes - Mullard xf2 EL34 as output, Brimar ECC88 as V1 and Sovtek 6922 as V2. Tubes do affect the sound significantly, and I will talk about that later in the discussion. My 450V 20mA bias Carbon with GRHV&LV will be a point of reference, as I am sure that this is a sound that many here are familiar with. It has the same volume pot as the mini T2 but SPC input wires and copper output wires. The mini T2 is full sounding with a natural tone. It has got a certain “WOW” factor that makes my carbon sound unimaginative in comparison. First off, the tonality of the mini T2 is warm and mildly bright such that the sound is airy but non-fatiguing, no matter how loud I cranked the volume up. The bass extends deep with a sufficient rumble where the track calls for it. The airy top end gives the amp a wide soundstage, that is paired with sufficient depth. Instrument and vocal placement are accurate and appropriate, without excessive forwardness or recess. Despite the soundstage being big, it does not sound hollow, because the music is full of details and creates a sense of well-layered space that is almost holographic. I have tested the amp briefly with other tubes and found that input and output tubes affect the sound most significantly. If input tubes have slightly mismatched sections, the balance would be too great to be zero-ed with potentiometer and balance servo. The small tubes I used are unassuming. Had I upgraded to better tubes, I guess the amp would sound better. Compared to the Carbon, the mini T2 sounds more organic, more layered and the mids are considerably warmer. It is also way more forgiving on bad recordings. The timbre sounds truer to life, soundstage is slightly larger, and feels like the music has more room to breathe. However, bass extension is not as deep as on the Carbon, and Carbon generally feels more analytical and snappier. To conclude, if there’s one word to describe this amp, it would be “fun”. It’s fun to build and definitely fun to listen to and roll tubes. I consider it as a step up from the Carbon when I use some decent tubes. Otherwise, this amp with standard new-production tubes would be at least on par as the Carbon.1 point


.jpg.4d1571cc2342a783446e7a131444562c.jpg)


Important Information
By using this site, you agree to our Terms of Use.
Account
Navigation
Search
Configure browser push notifications
Chrome (Android)
- Tap the lock icon next to the address bar.
- Tap Permissions → Notifications.
- Adjust your preference.
Chrome (Desktop)
- Click the padlock icon in the address bar.
- Select Site settings.
- Find Notifications and adjust your preference.
Safari (iOS 16.4+)
- Ensure the site is installed via Add to Home Screen.
- Open Settings App → Notifications.
- Find your app name and adjust your preference.
Safari (macOS)
- Go to Safari → Preferences.
- Click the Websites tab.
- Select Notifications in the sidebar.
- Find this website and adjust your preference.
Edge (Android)
- Tap the lock icon next to the address bar.
- Tap Permissions.
- Find Notifications and adjust your preference.
Edge (Desktop)
- Click the padlock icon in the address bar.
- Click Permissions for this site.
- Find Notifications and adjust your preference.
Firefox (Android)
- Go to Settings → Site permissions.
- Tap Notifications.
- Find this site in the list and adjust your preference.
Firefox (Desktop)
- Open Firefox Settings.
- Search for Notifications.
- Find this site in the list and adjust your preference.